The problem
Designing an effective video conferencing room can be a significant challenge. A camera’s FoV (field of view) and PTZ (pan, tilt and zoom) capabilities dictate the locations and room types where it will perform best . Combine that with different conference table placement, shapes, and sizes, and it can be difficult to ensure the camera is providing the best possible view of everyone in the room.
With upcoming technologies like the Zoom Smart Gallery, that encourage multiple cameras in each room, the need to quickly understand how a camera will perform has never been more important.
The solution
Modus provides tools to solve this problem with ease, even if you’re not familiar with a given camera, by helping you know exactly what the camera is capable of seeing in the context of a real-world room.
How it works
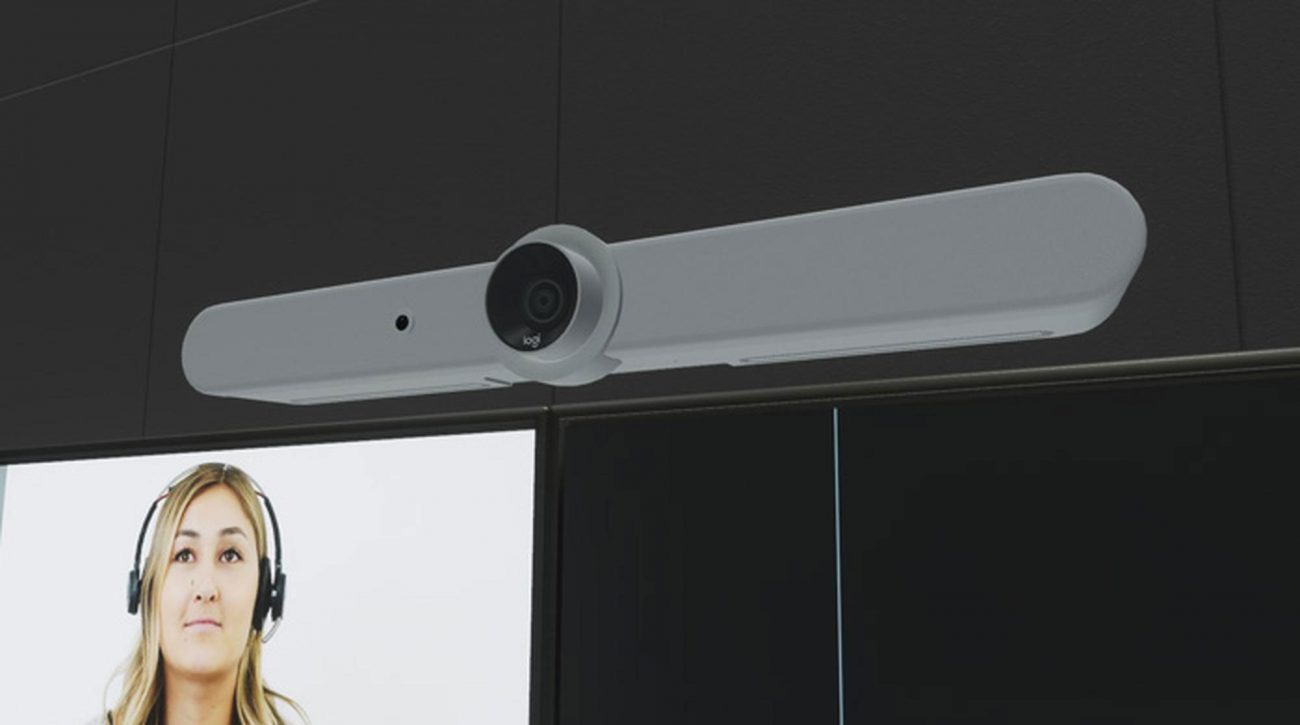
You start by placing a camera somewhere in your project. In this case, we’ll use the Logitech Rally Bar.
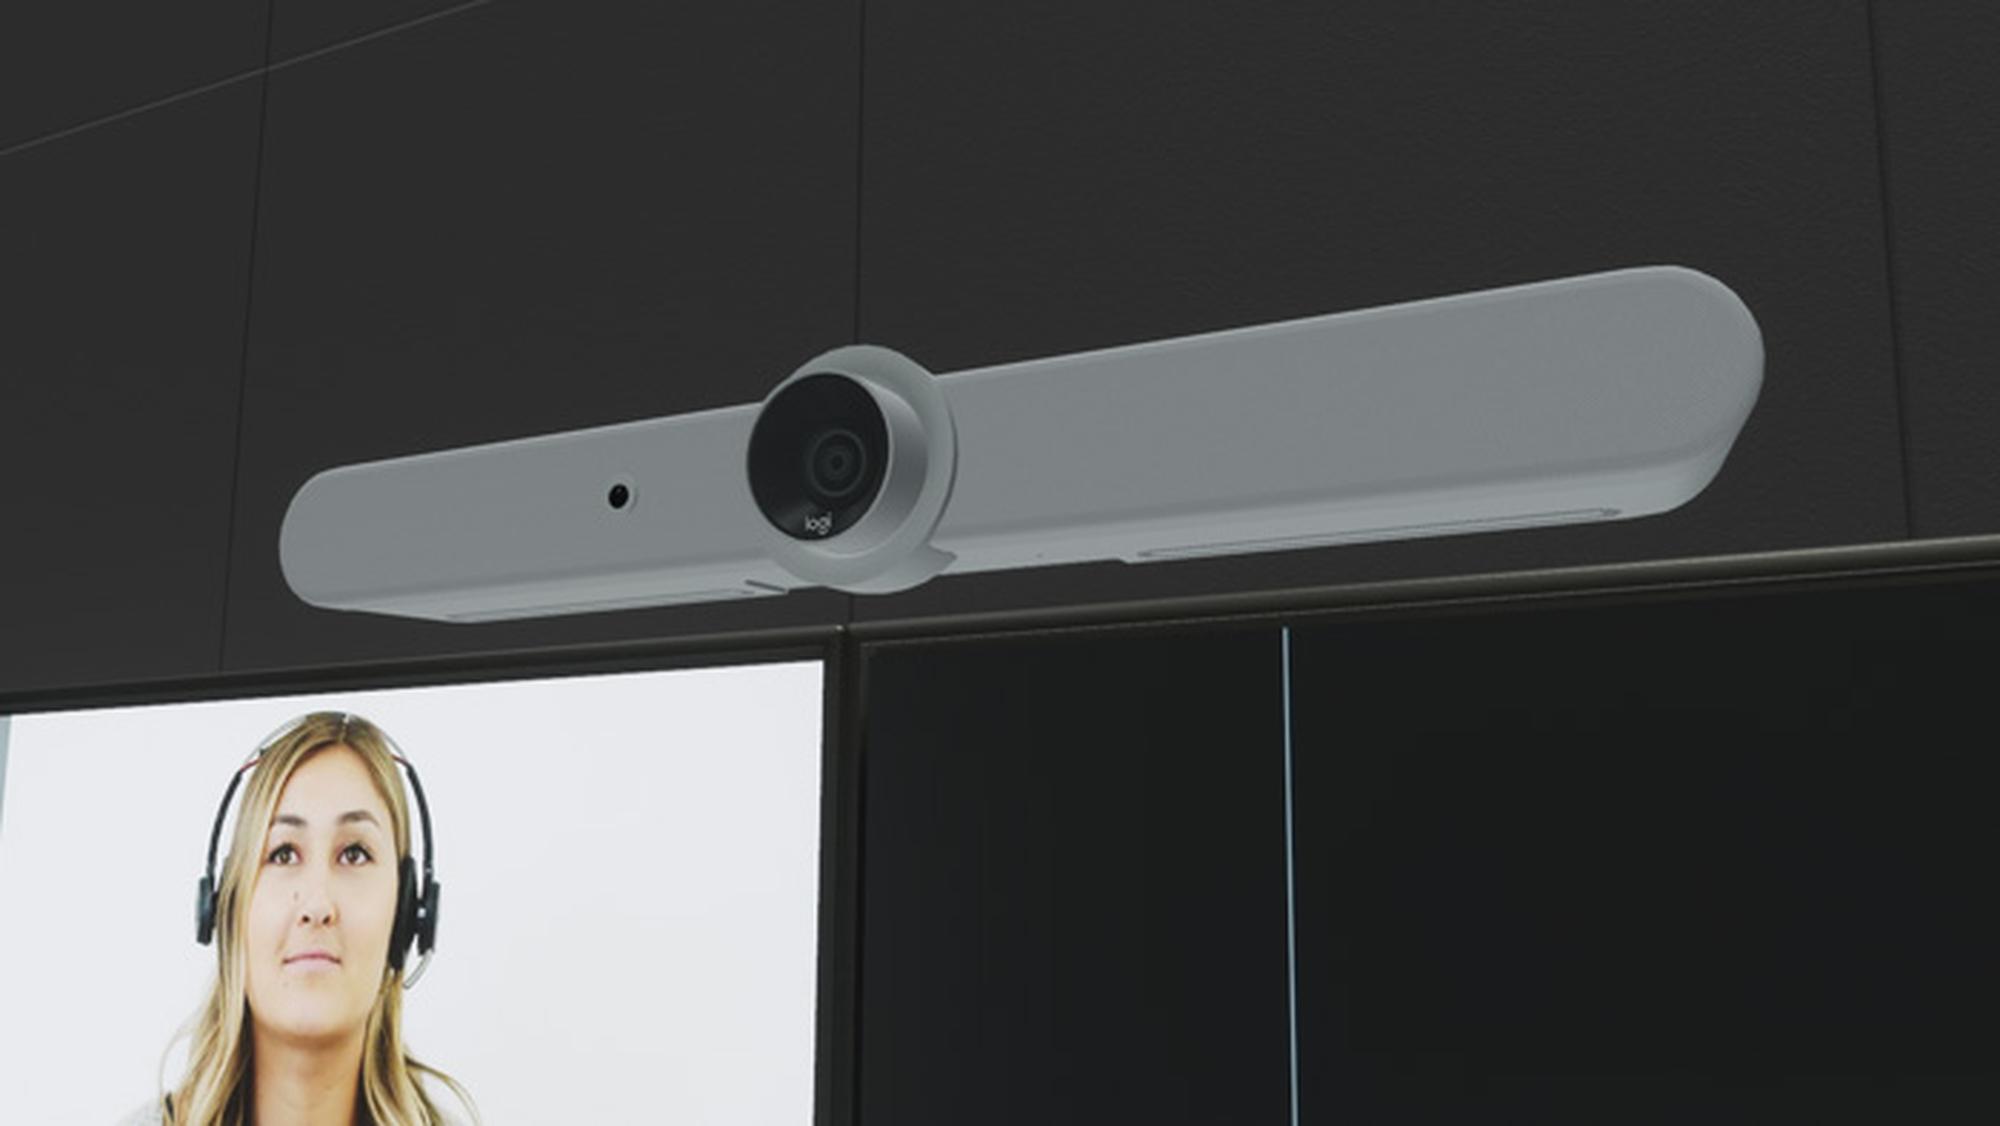
THE RALLY BAR BY LOGITECH
And here’s a look at the UI. All cameras in Modus VR have a similar interface:
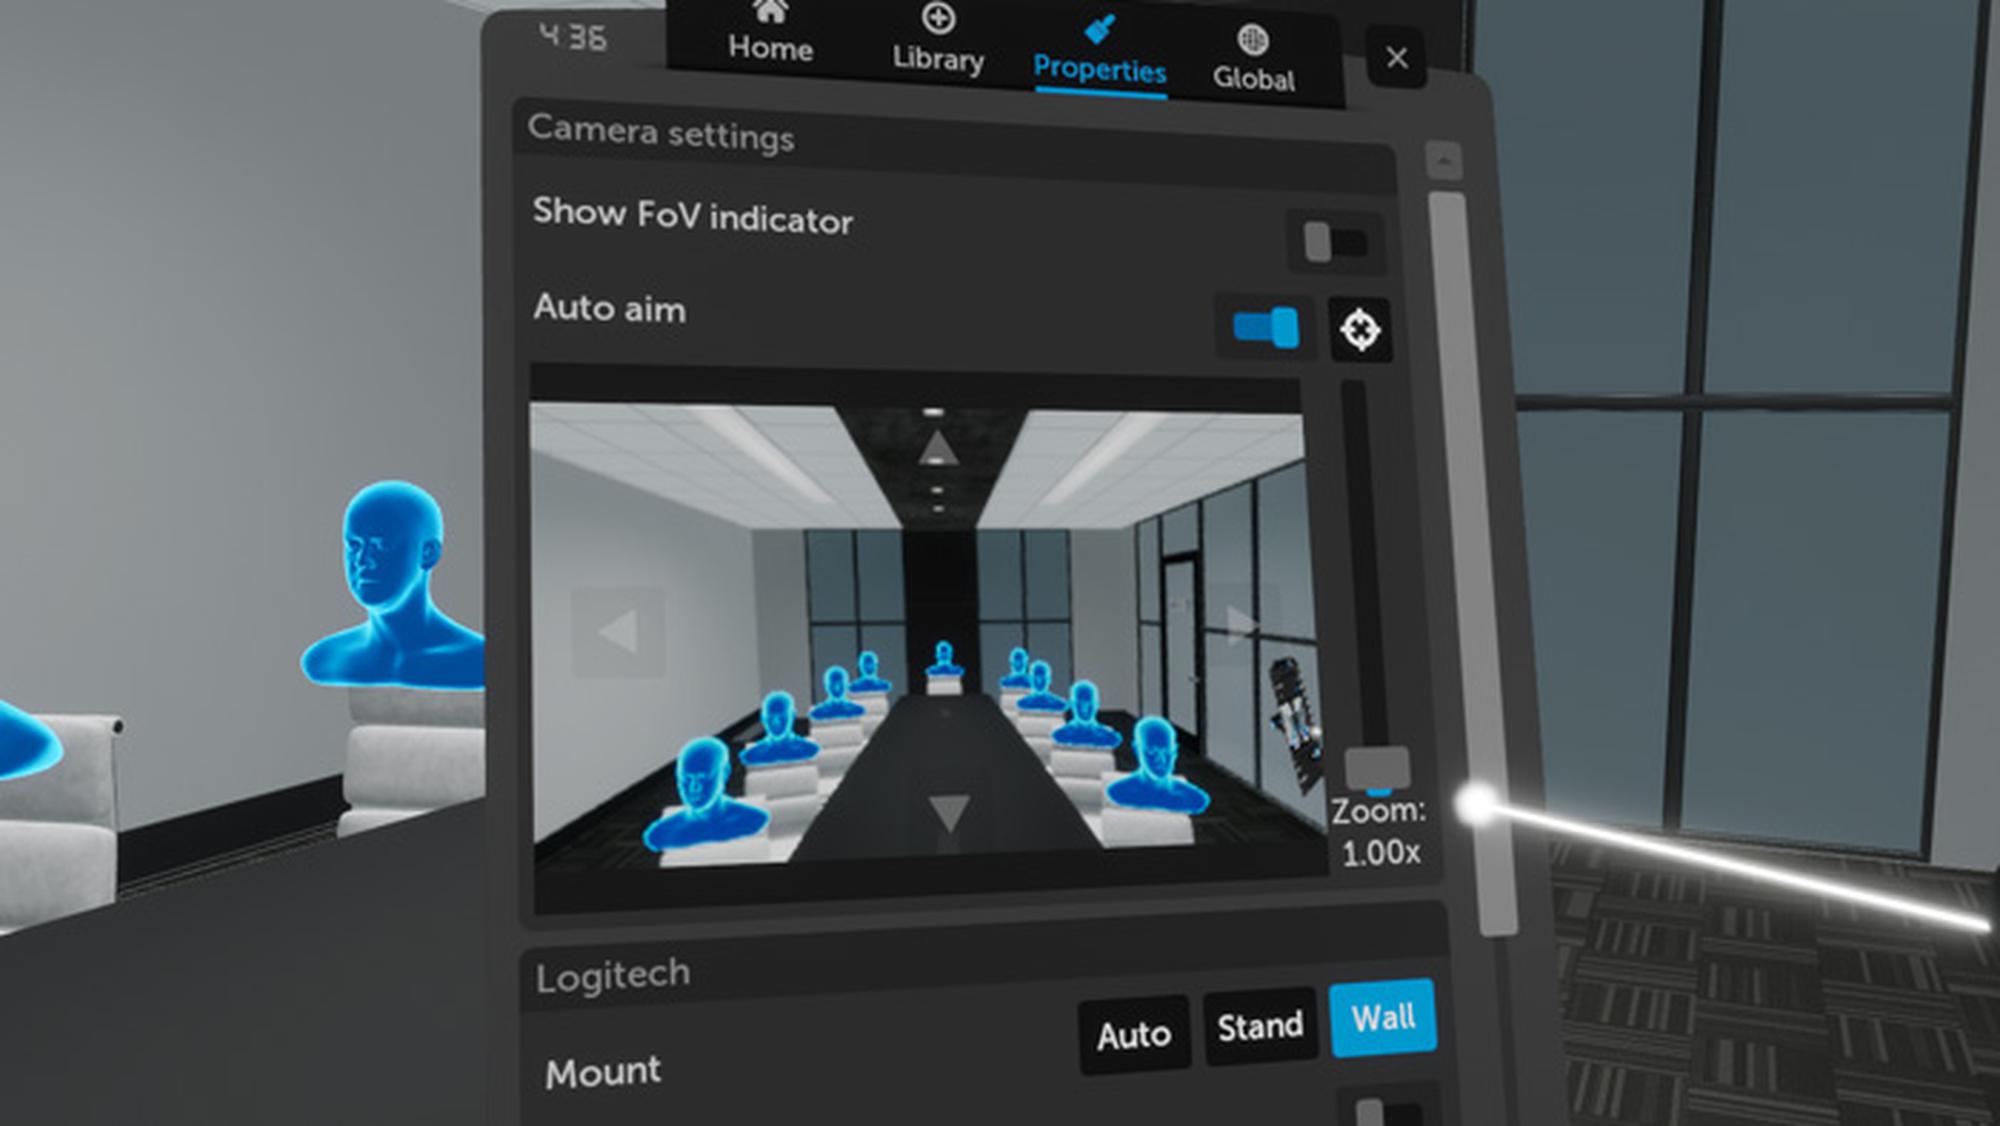
CONTROLS FOR DISPLAYING THE FOV INDICATOR, AIMING AND ZOOMING THE CAMERA, AND PREVIEWING THE FAR-END VIEW
Visualize FoV
Enable the ‘Show FoV’ toggle to visualize the camera’s field of view. This indicates what the camera will see based on its horizontal FoV, vertical FoV, and PTZ settings.
Manual and Auto Aim
The color of the visualization is also important. If it’s blue, it means the camera is in Manual Aim mode. By default, the camera is in Auto Aim mode, and will be colored green, yellow or red based on how well it can focus on a user-defined spot in the 3D world.
When you click the Aim button, a target appears at your location in 3D space and the camera will use its pan and tilt functionality to center the shot on that location. While in Auto Aim mode, as you move the camera around it will attempt to keep that target at the center of the frame.
If the camera is able to keep that location in the center, the visualization will be green. If the camera can keep that location in the frame but not in the center, the visualization will be yellow. Finally, if the location can’t be in the frame at all, the visualization turns red.
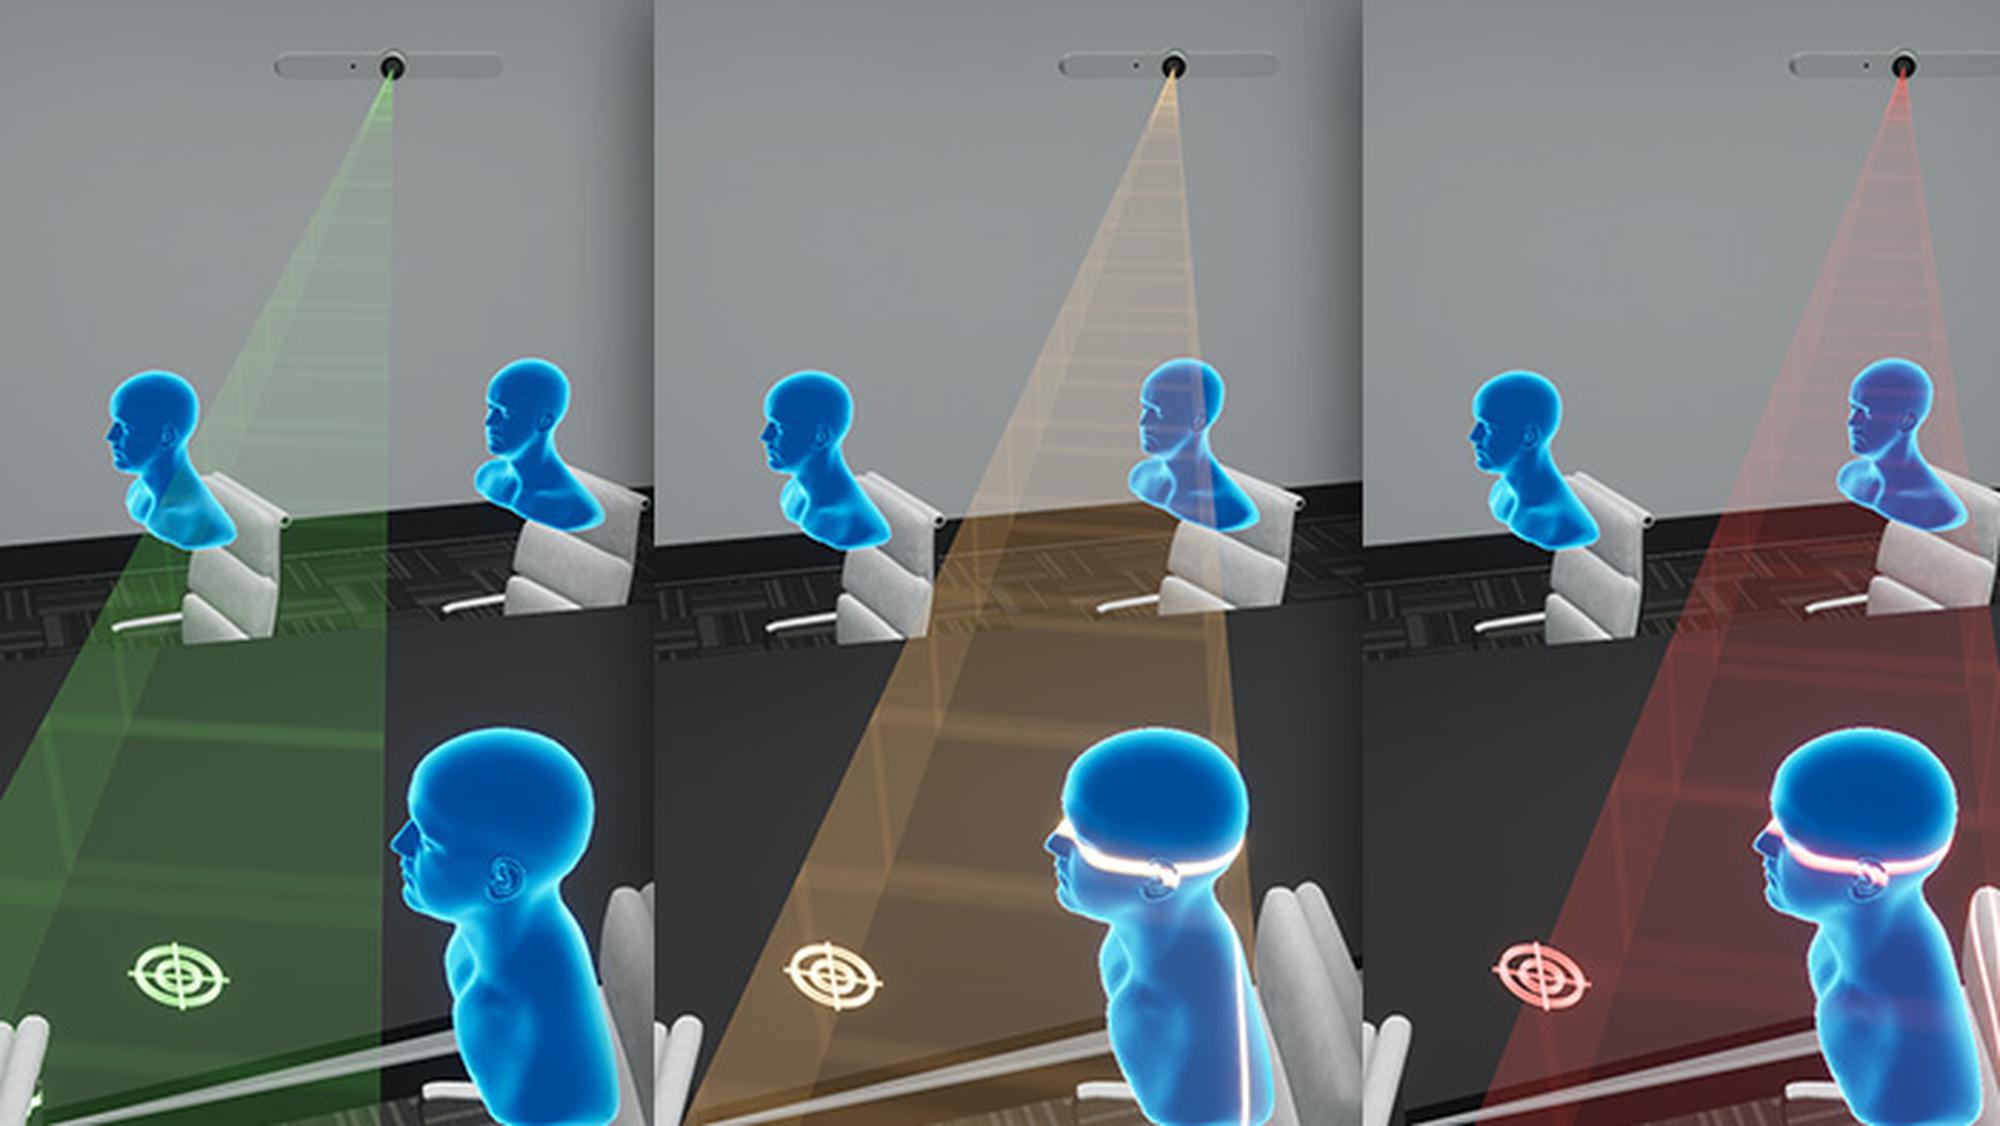
LEFT: THE TARGET IS AT THE CENTER OF THE SHOT. MIDDLE: THE TARGET IS IN THE SHOT, BUT THE CAMERA’S PAN AND TILT ISN’T ENOUGH TO KEEP IT CENTERED. RIGHT: THE TARGET IS NOT IN THE SHOT AT ALL. WE INCREASED THE CAMERA’S ZOOM TO 12X TO EXAGGERATE THE EFFECT.
In a practical sense, this feature lets you define a seat in the room you care about and then rapidly experiment with different camera locations to see how well the camera will perform.
Far-end view
To further optimize camera placement, you can also see the far-end view. For example, a camera typically provides a much more flattering view when placed above a screen rather than below, even though it technically shows everyone in the room in both cases. Turn on one of the assistants that displays heads to quickly compare results.
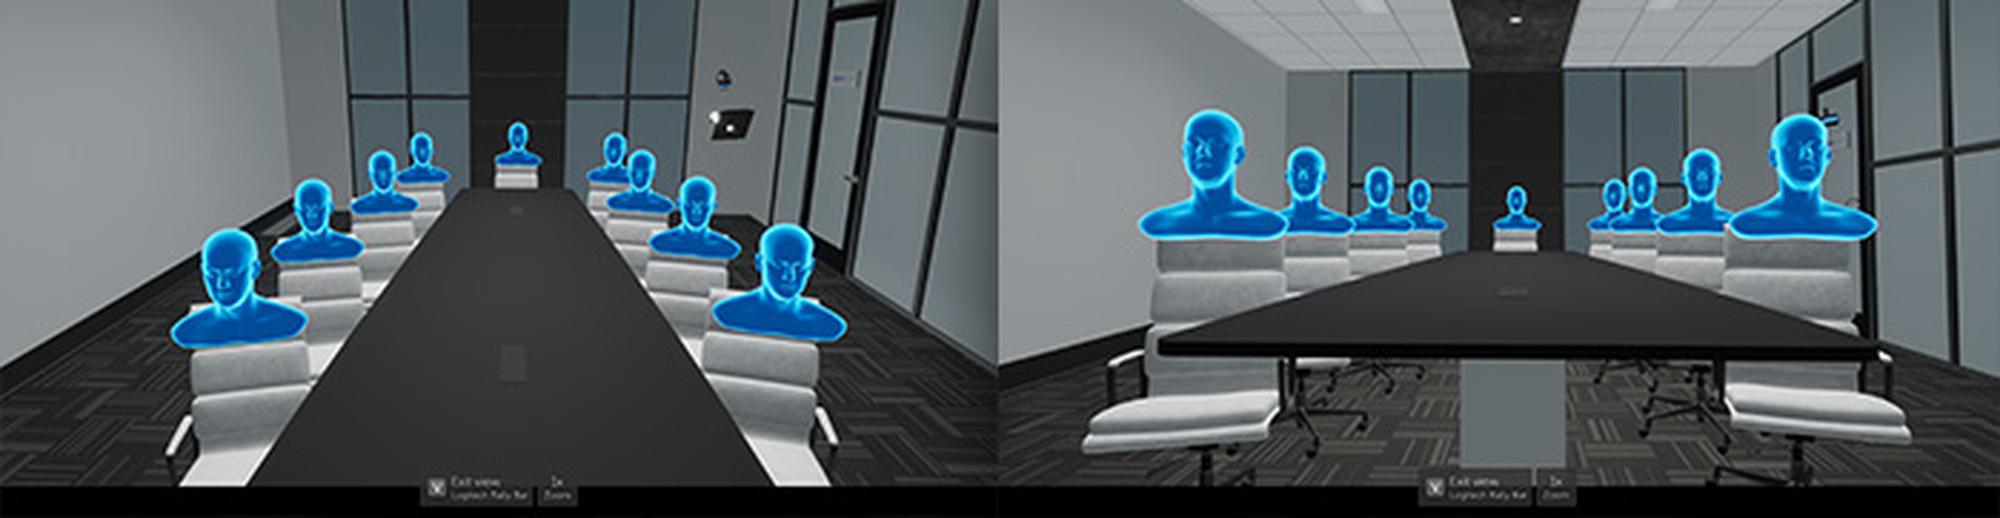
USING THE FAR-END VIEW TO VISUALIZE THE QUALITY OF THE SHOT. LEFT: THE CAMERA IS ABOVE THE SCREEN. RIGHT: THE CAMERA IS BELOW THE SCREEN.
Pan, tilt, and zoom
You can also fine tune the camera’s pan and tilt settings by clicking the up, down, left and right arrows in the far-end view. Adjusting these will exit Auto Aim mode and, if enabled, the visualization will turn blue to indicate it’s now in Manual Mode. Adjusting zoom does not automatically exit Auto Aim mode.
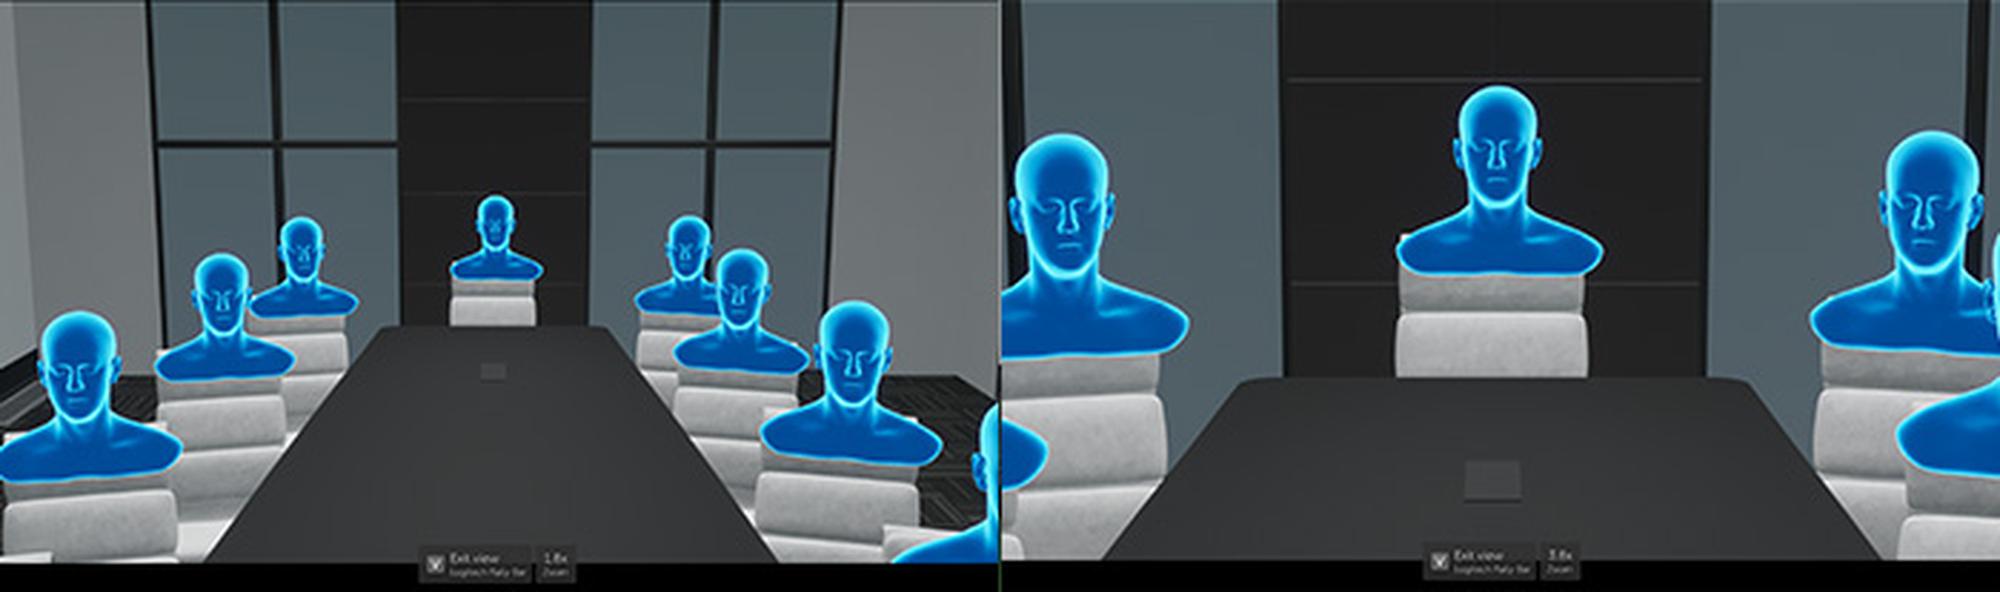
LEFT: FAR-END VIEW AT 1.8X ZOOM. RIGHT: FAR-END VIEW AT 3.8X ZOOM.
Like all the other camera settings, PTZ abilities are based on the manufacturer’s specifications. The camera can only pan, tilt, and zoom as much as the real-world product allows.
Generic Camera
What about cases where the camera you’re working with isn’t in Modus? That’s where the Generic Camera comes in. In addition to the standard camera controls shown above, the Generic Camera also has a UI to set its specs.

YOU CAN SET THE CAMERA’S HORIZONTAL FOV, VERTICAL FOV, PAN AND TILT RANGES, AND MAXIMUM ZOOM TO EMULATE THE BEHAVIOR OF MOST CAMERAS.
You can set the camera’s horizontal FoV, vertical FoV, pan and tilt ranges, and maximum zoom to emulate the behavior of most cameras.
Modus Photo
Once you’ve placed and configured the camera for optimal performance, you may need to include the far-end view in documentation. To do that, save your project before exiting VR and then open it in Modus Photo.
Navigate to within a few feet of any camera and you’ll see a tooltip appear on the camera:
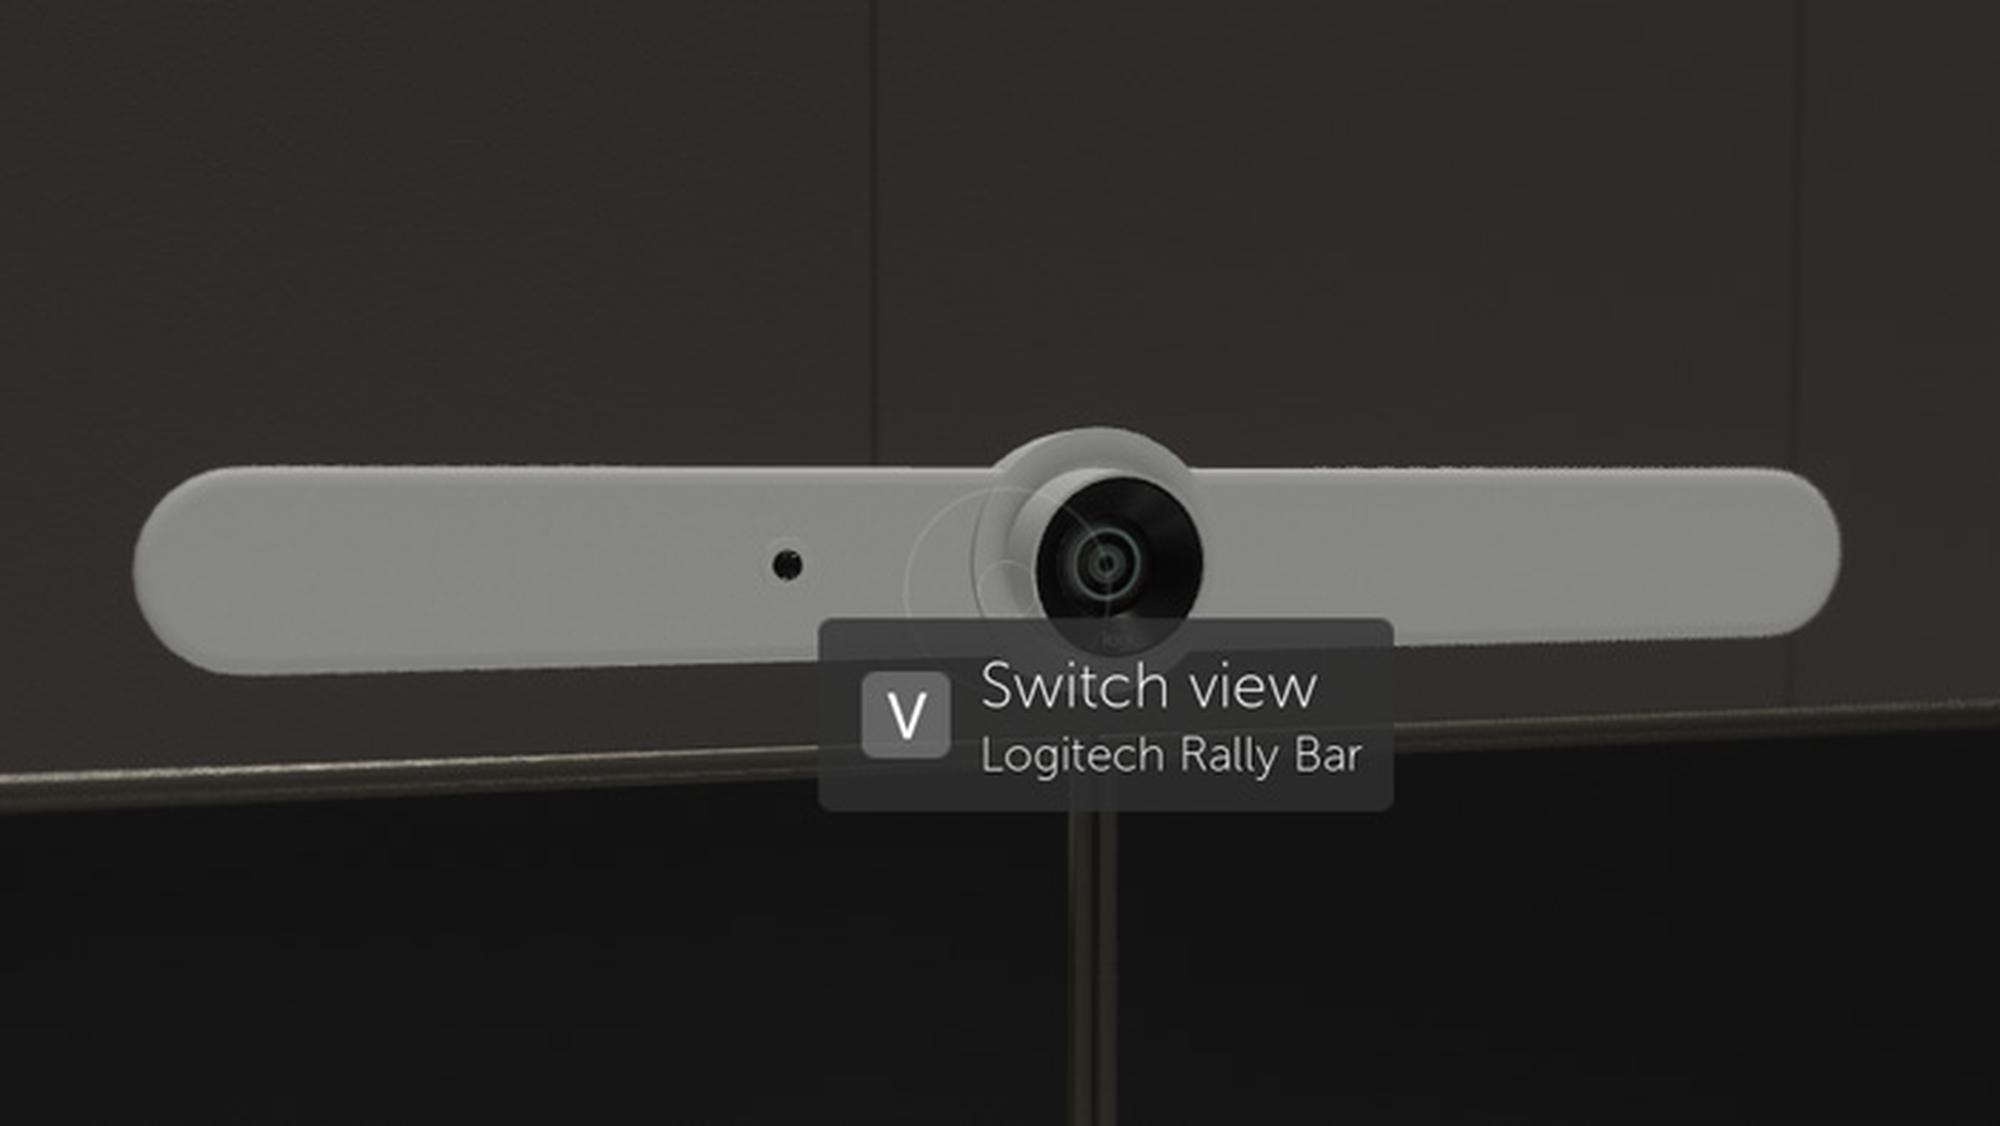
A TOOLTIP APPEARS AS YOU GET CLOSE TO THE CAMERA
Press V to switch to the camera’s view:

YOUR SCREEN NOW SHOW’S THE CAMERA’S FAR-END VIEW. IF THE CAMERA’S ASPECT RATIO DOESN’T MATCH YOUR MONITOR’S, THE VIEW WILL BE LETTERBOXED.
Simply take a photo like you normally would by pressing Enter and it’ll output an image that matches your target resolution (1080p, 4k, or 8k). The image’s aspect ratio will match the aspect ratio of the camera.
Summary
Because of the different capabilities of every camera on the market, specifying and placing them in a conference room can be a tedious and time consuming task. Modus VR’s camera FoV tools make this process simple and easy, and can even lead to creative solutions to complex problems.