Introducing the new Dolby Atmos speaker placement assistant! This article will go deeper into how this Design Assistant functions and how you can best take advantage of it.
Introduction
We rebuilt the previous assistant with the following goals in mind:
- Represent more of the supported options listed on Dolby’s speaker setup guides, including non-Atmos surround setups.
- Increase accuracy of Atmos overhead speaker placement recommendations.
- Provide clearer delineation of ear-level speakers, overhead speakers, and height speakers.
- Indicate the recommended speaker angles on the floor and ceiling to better help with floor-standing and bookshelf speaker placement.
- Clearly identify the reference point used for speaker placement.
- Increase rendering performance when the assistant is activated.
The following are currently out of scope for the speaker placement assistant:
- Expand on the Atmos spec to make recommendations in scenarios where the spec is notably inadequate:
- Adding more surround speakers to accommodate multi-row seating.
- Different strategies for asymmetrical rooms.
- Alternate recommendations when a speaker can’t go where the spec says it should, e.g. on a window.
- Recommend placement of up-firing or Atmos-enabled speakers.
Enabling the Speaker Placement assistant
To turn on the Speaker Placement assistant, go to the Global Tab, Design Assistants section, and open the Dolby Atmos dropdown.
SPEAKER PLACEMENT DROPDOWN
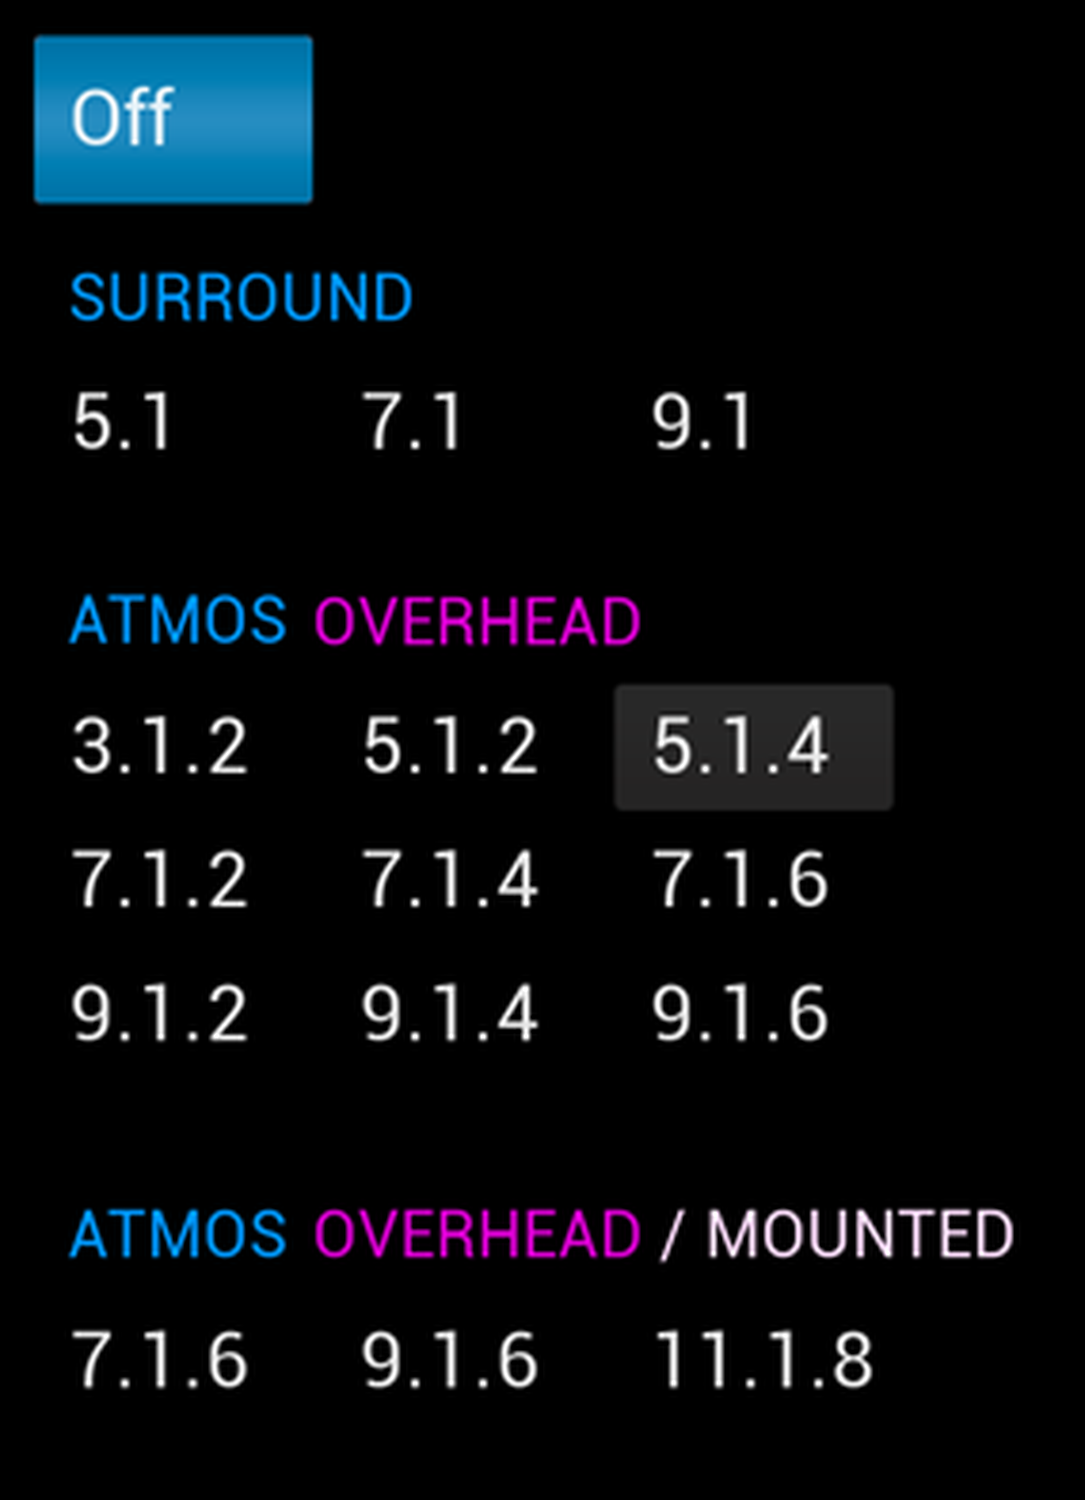
This is divided into three sections:
- Surround: Legacy surround formats that do not have height or overhead speakers
- Atmos Overhead: Dolby Atmos layouts that have ear-level and overhead speakers.
- Atmos Overhead / Mounted: Dolby Atmos layouts that have ear-level, overhead, and mounted height speakers.
Select one of these to make the speaker placement grids visible. Note that a screen and seat are required for this to work.
How it works
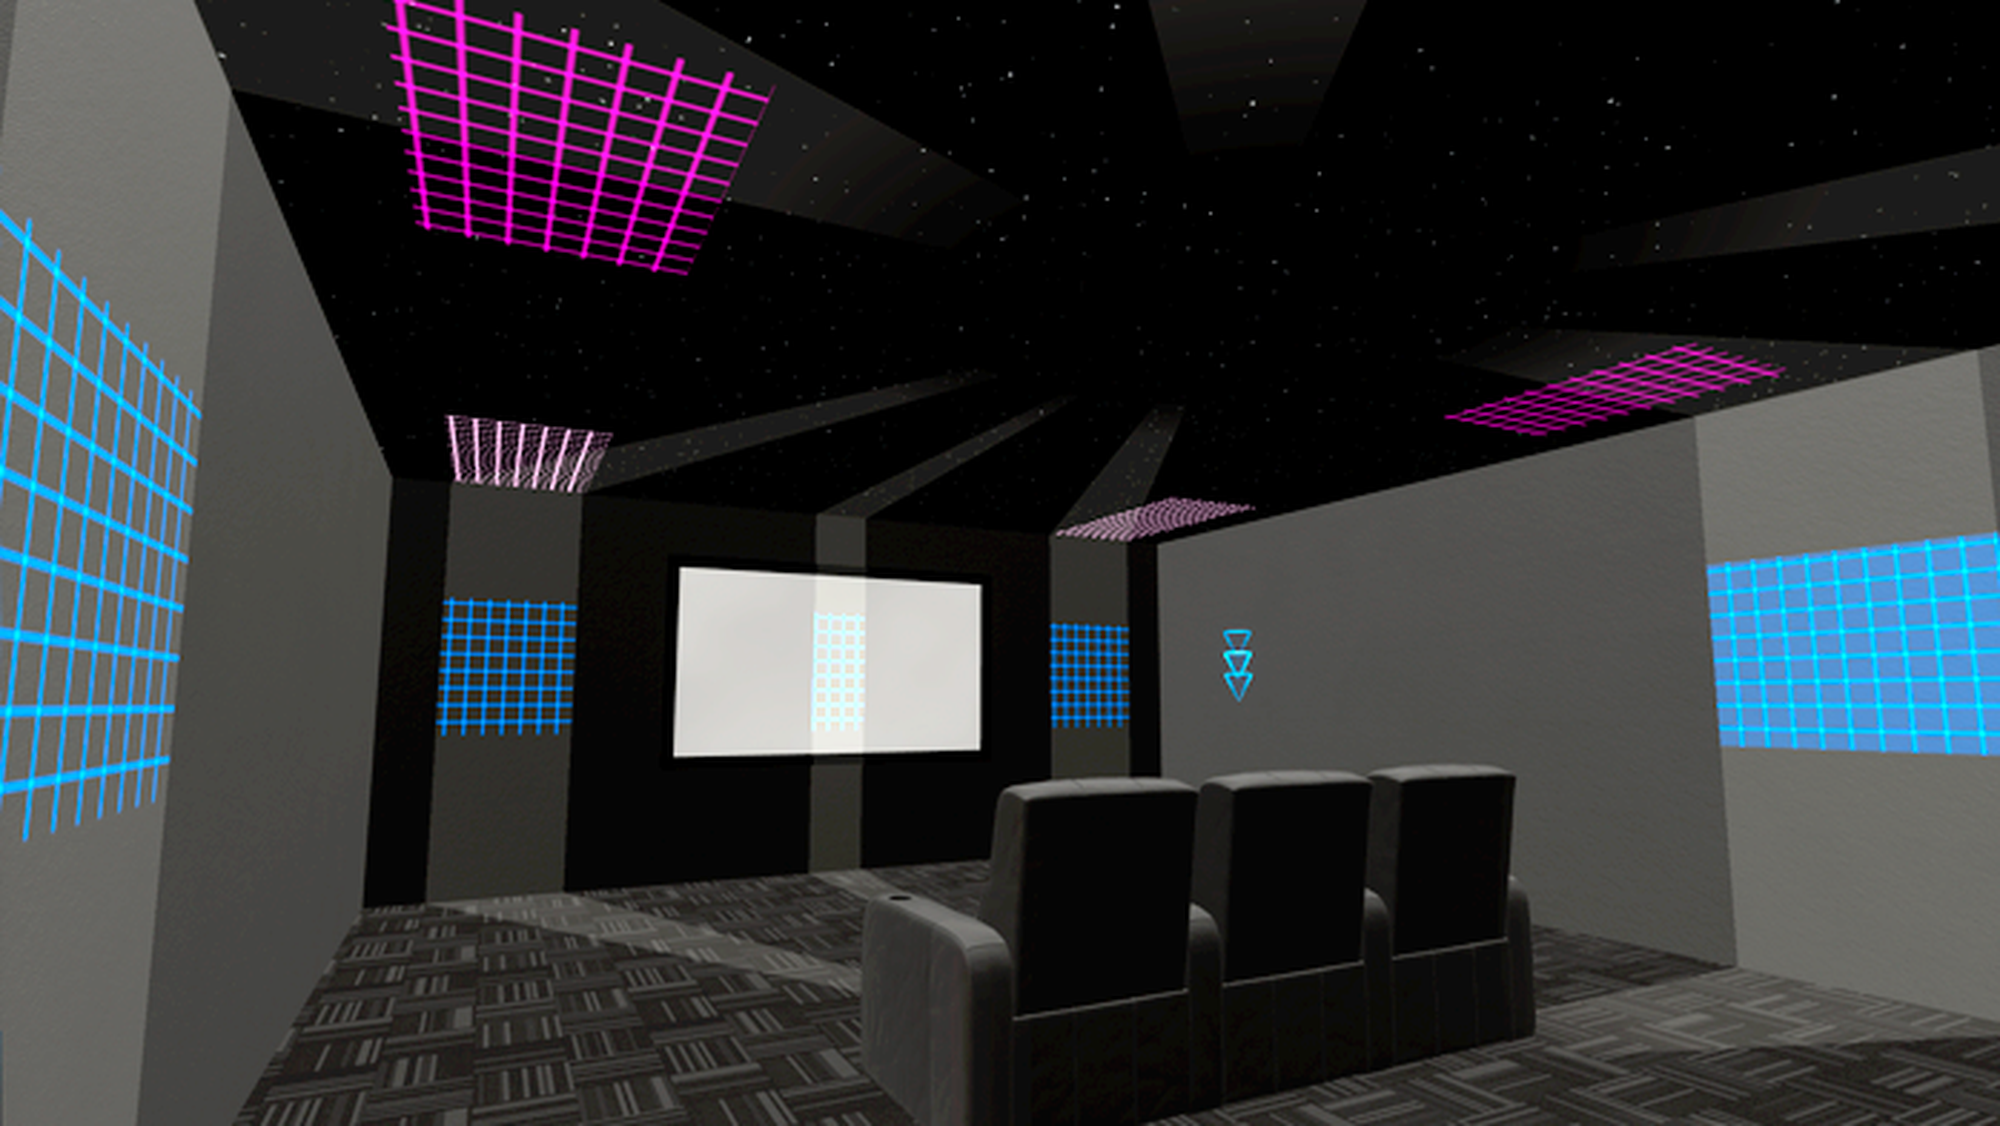
The objective with any Atmos setup is to create a dome of speakers around the listeners. Modus makes it easy to experiment with different layouts to best accomplish this. In this section, we’ll cover how the speaker placement grids are calculated.
Modus uses the primary seat and primary screen to calculate a reference point, and the location of all speaker grids are then determined from that point. By default, the primary seat and screen are automatically selected by Modus for you. If you want to explicitly select either of these, you can do so in the UI just below the design assistants:
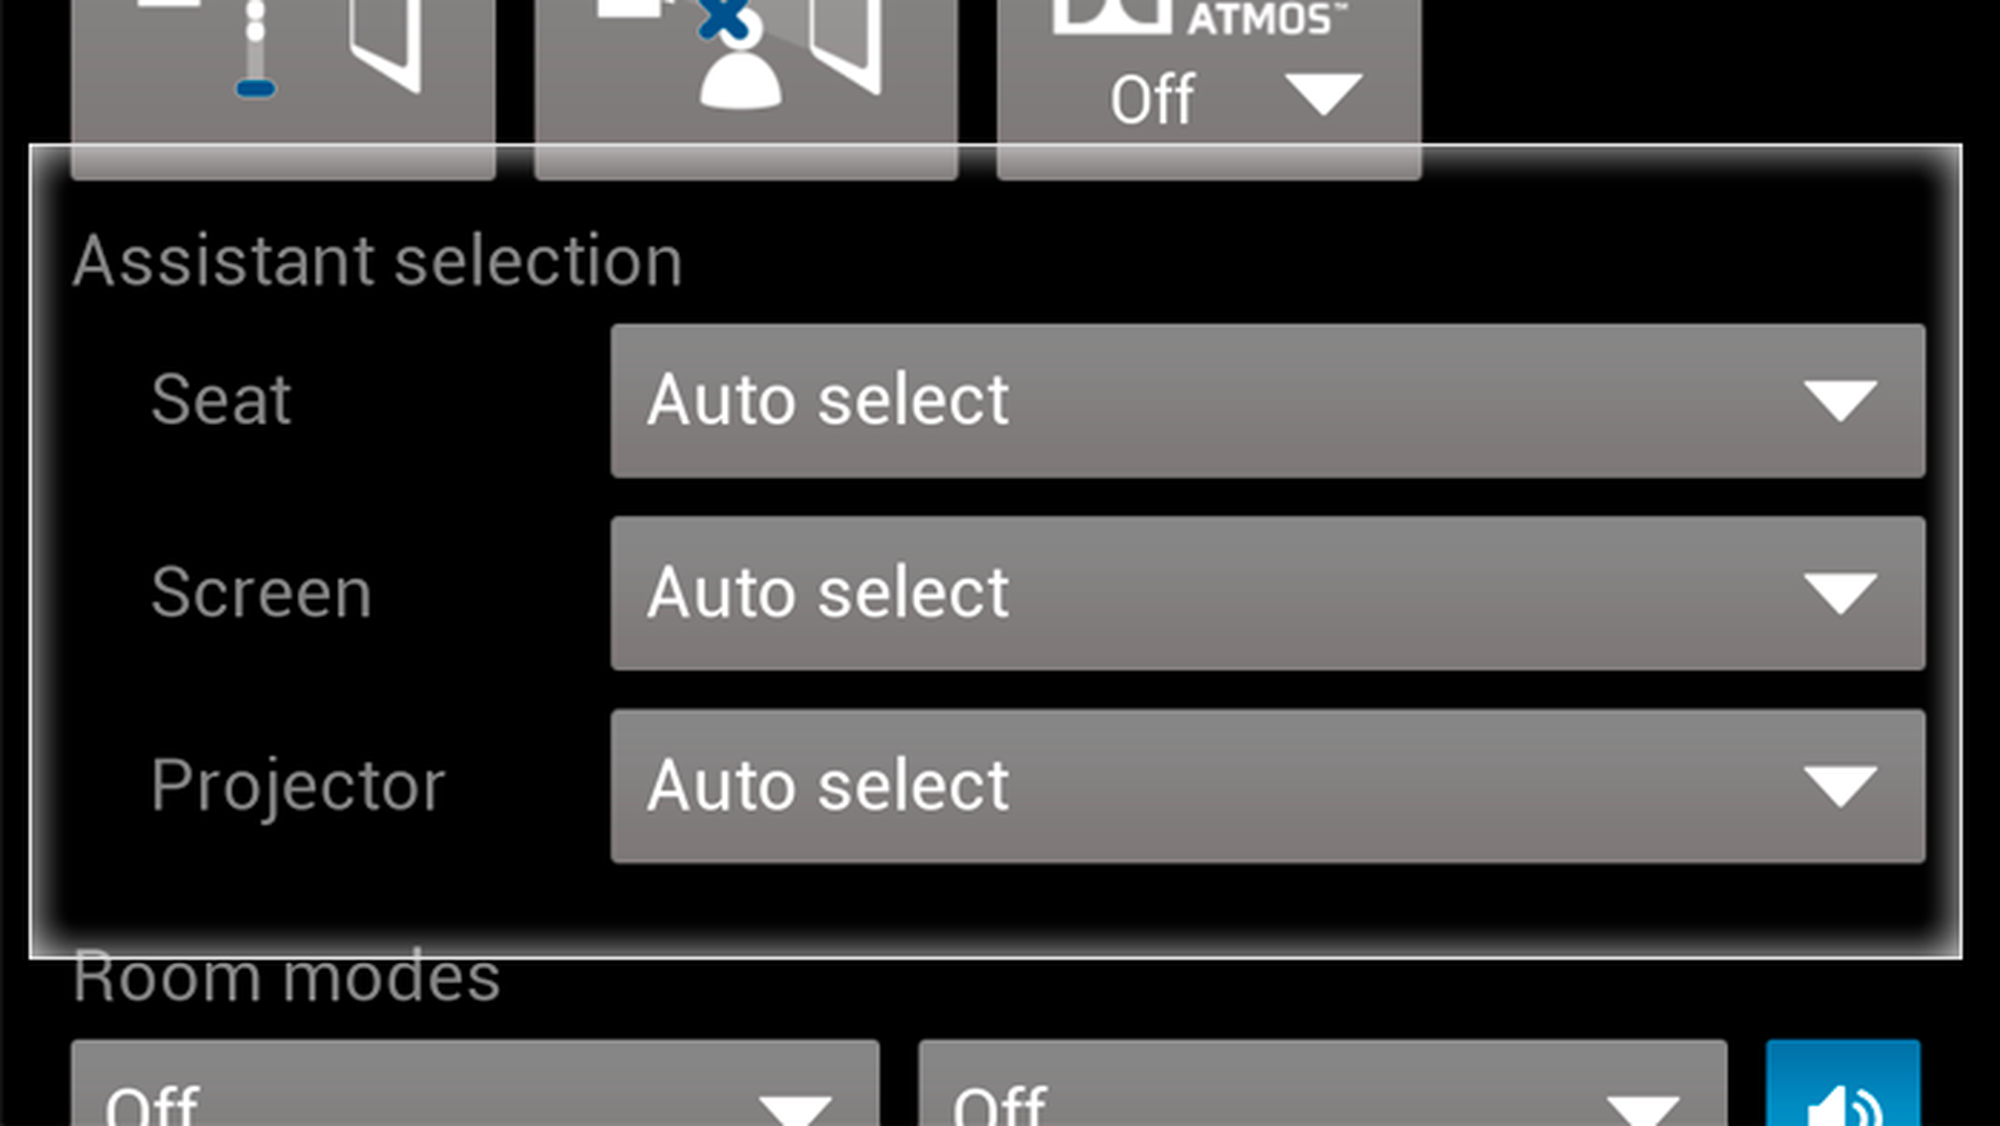
YOU CAN OVERRIDE MODUS VR’S AUTOMATIC SEAT, SCREEN OR PROJECTOR SELECTION WITH THIS UI.
For more on how the reference point is determined, see: Understanding how the reference point is calculated later in the post.
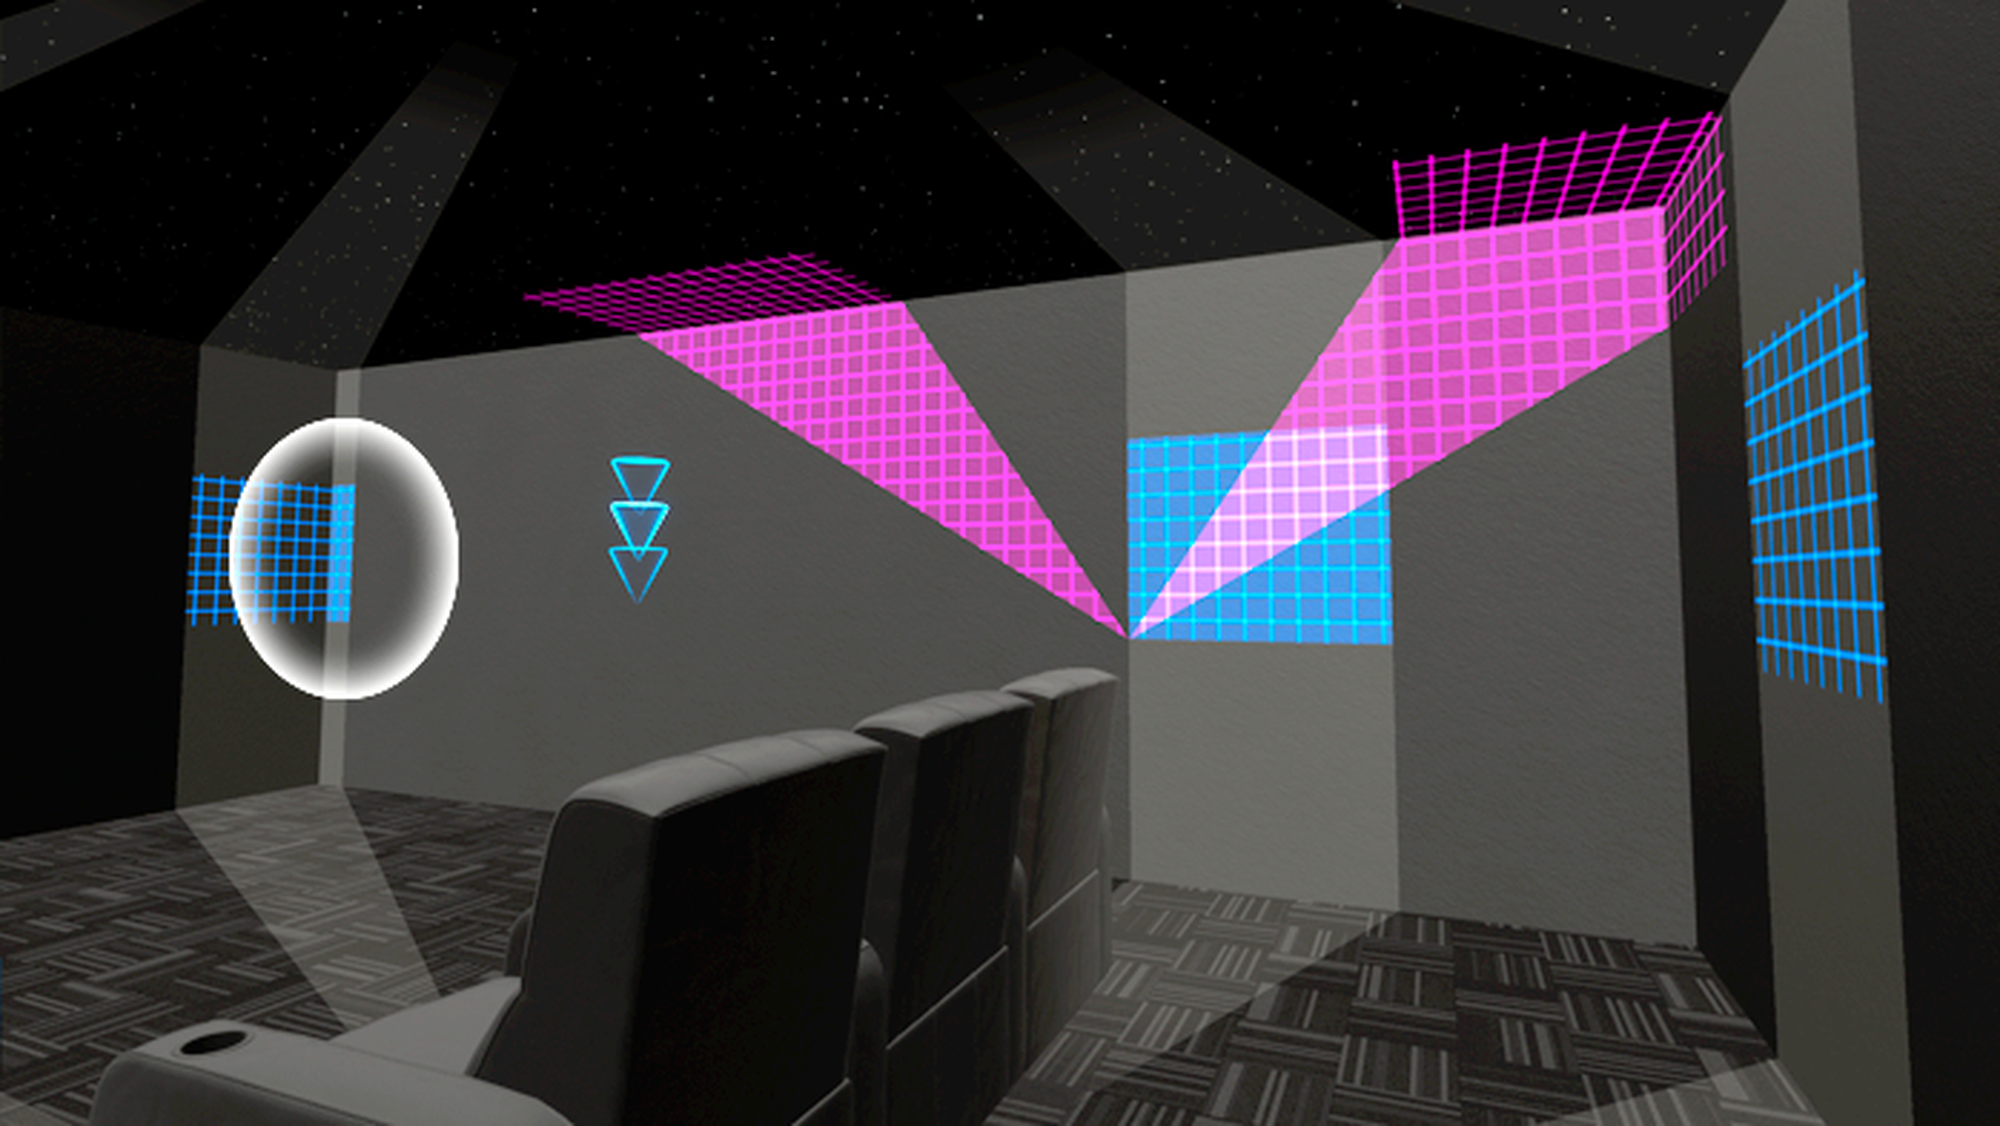
All calculations are updated in real time, so you can quickly visualize how the current options impact recommended speaker placement. The current calculated reference point is indicated by these arrows:
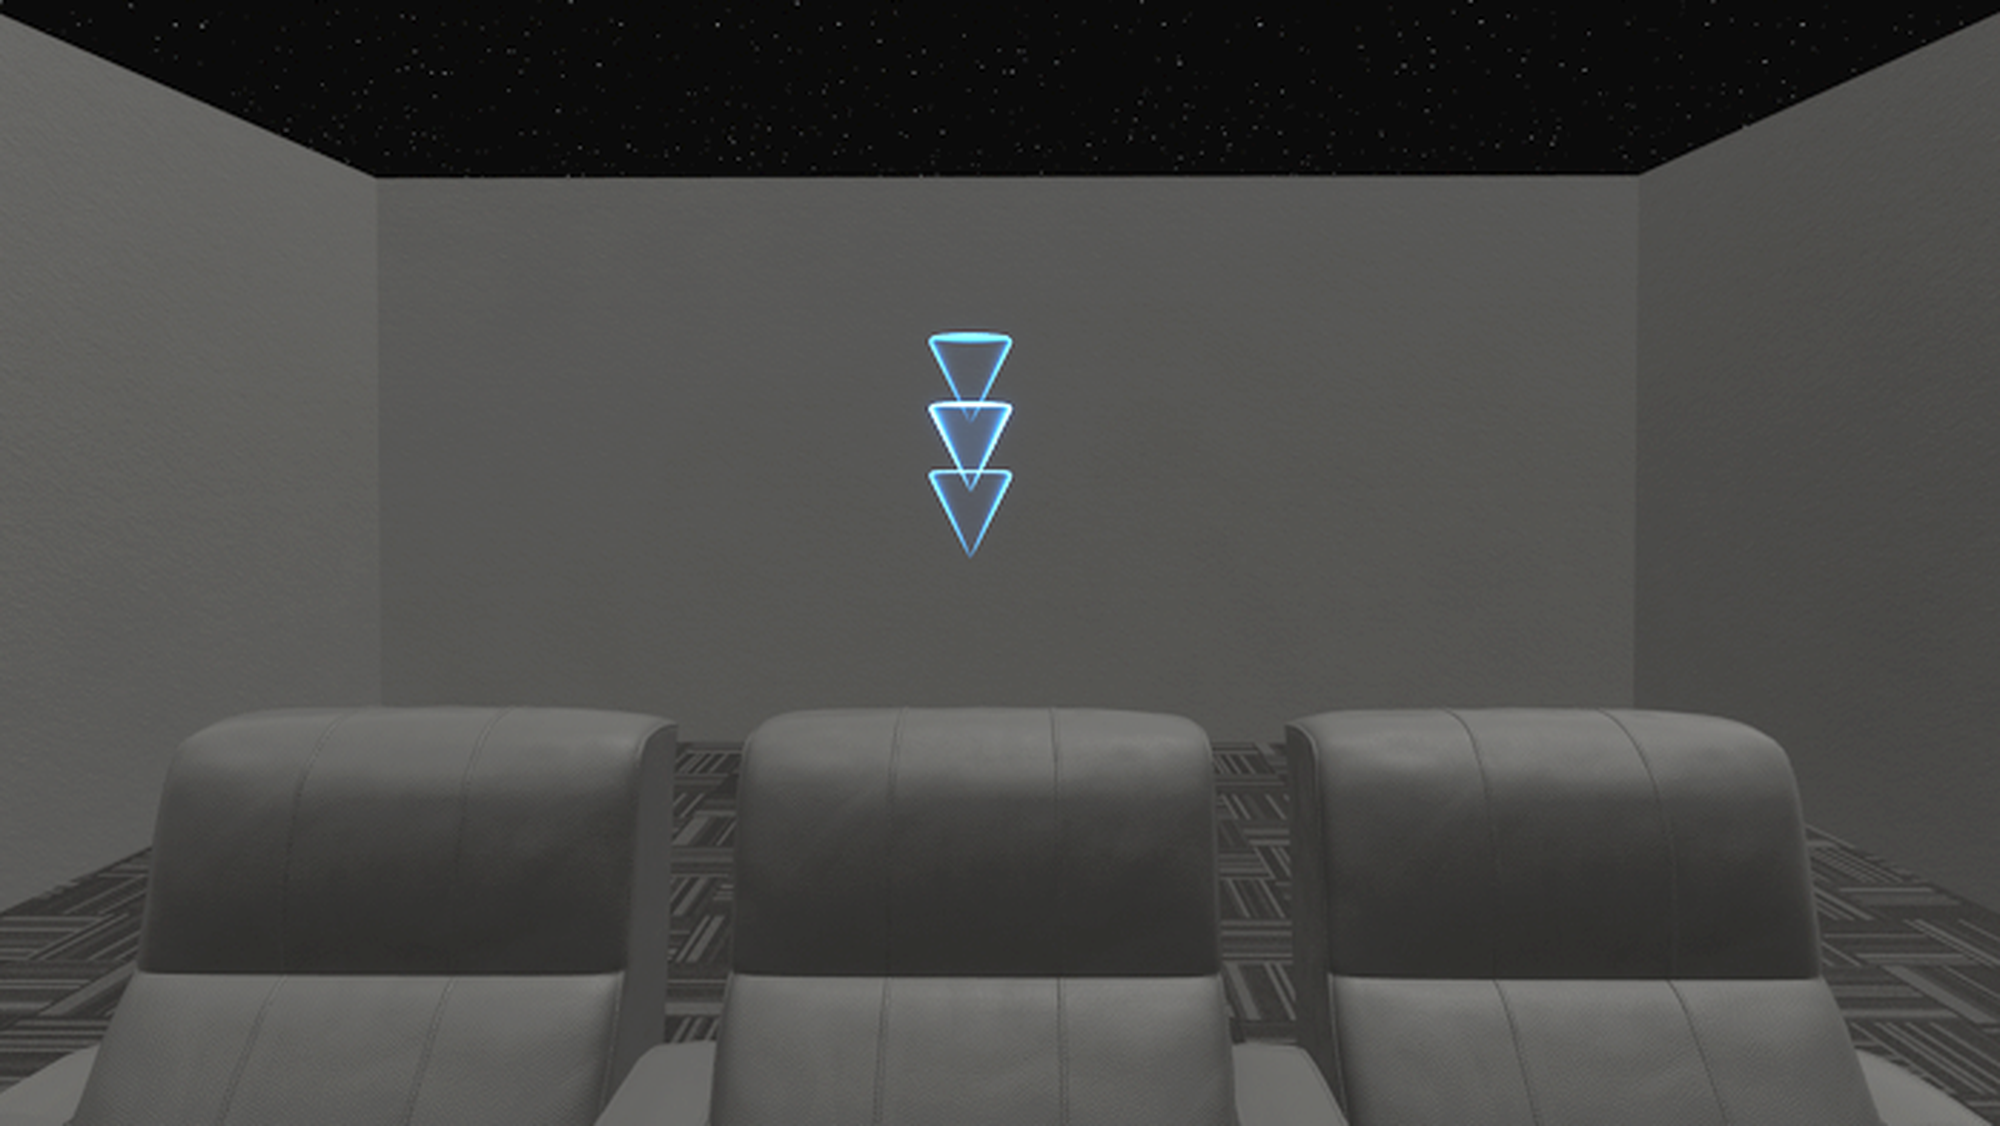
THE CALCULATED REFERENCE POINT IS INDICATED BY THESE ANIMATED ARROWS.
Ear-level speakers
We’ll use the LCR speakers to explain how ear-level speaker placement works.
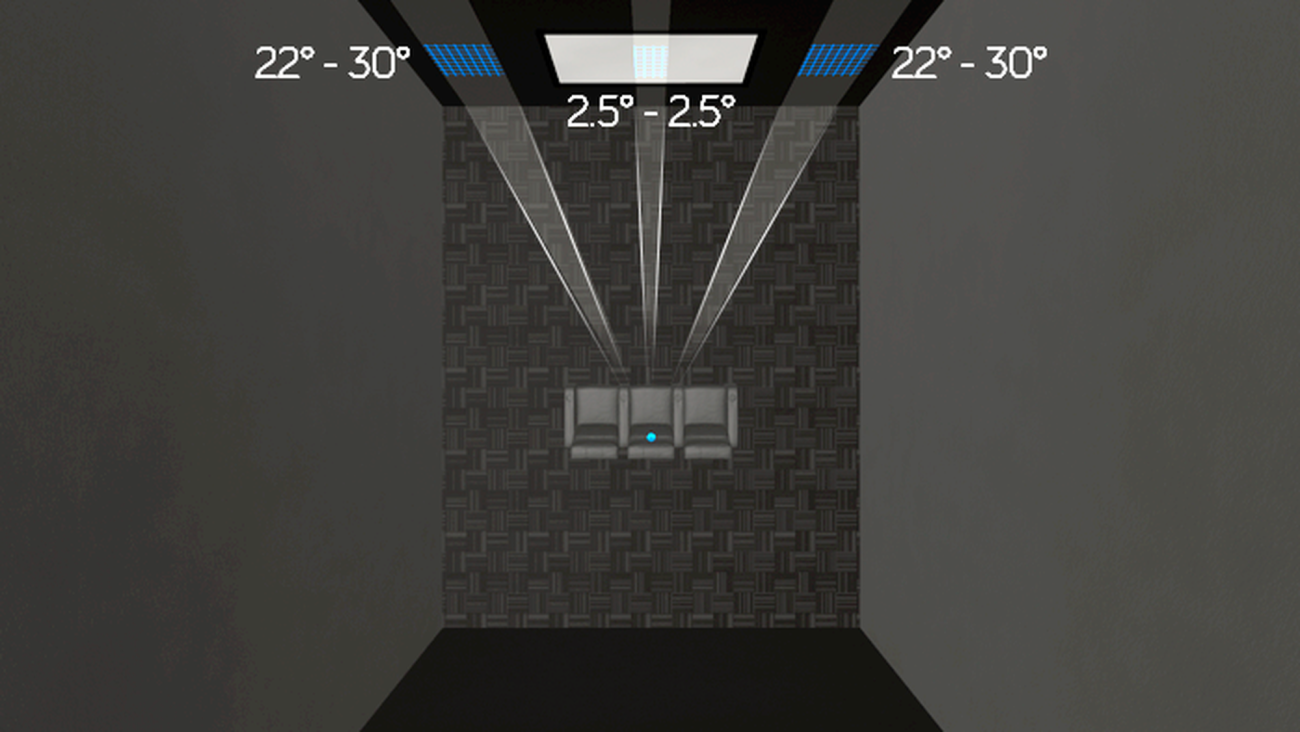
From the reference point, Modus draws angles towards the screen for the left and right speakers from 22° to 30°. To make the center channel grid easier to see we draw it from -2.5° to 2.5° rather than Dolby’s recommended 0°.

LEFT, CENTER AND RIGHT SPEAKER ANGLES PROJECTED TOWARDS THE SCREEN.
Modus also makes each grid roughly 3 feet tall with the bottom level with the reference point. All other ear-level speakers, including surrounds, are drawn this way and are colored blue.
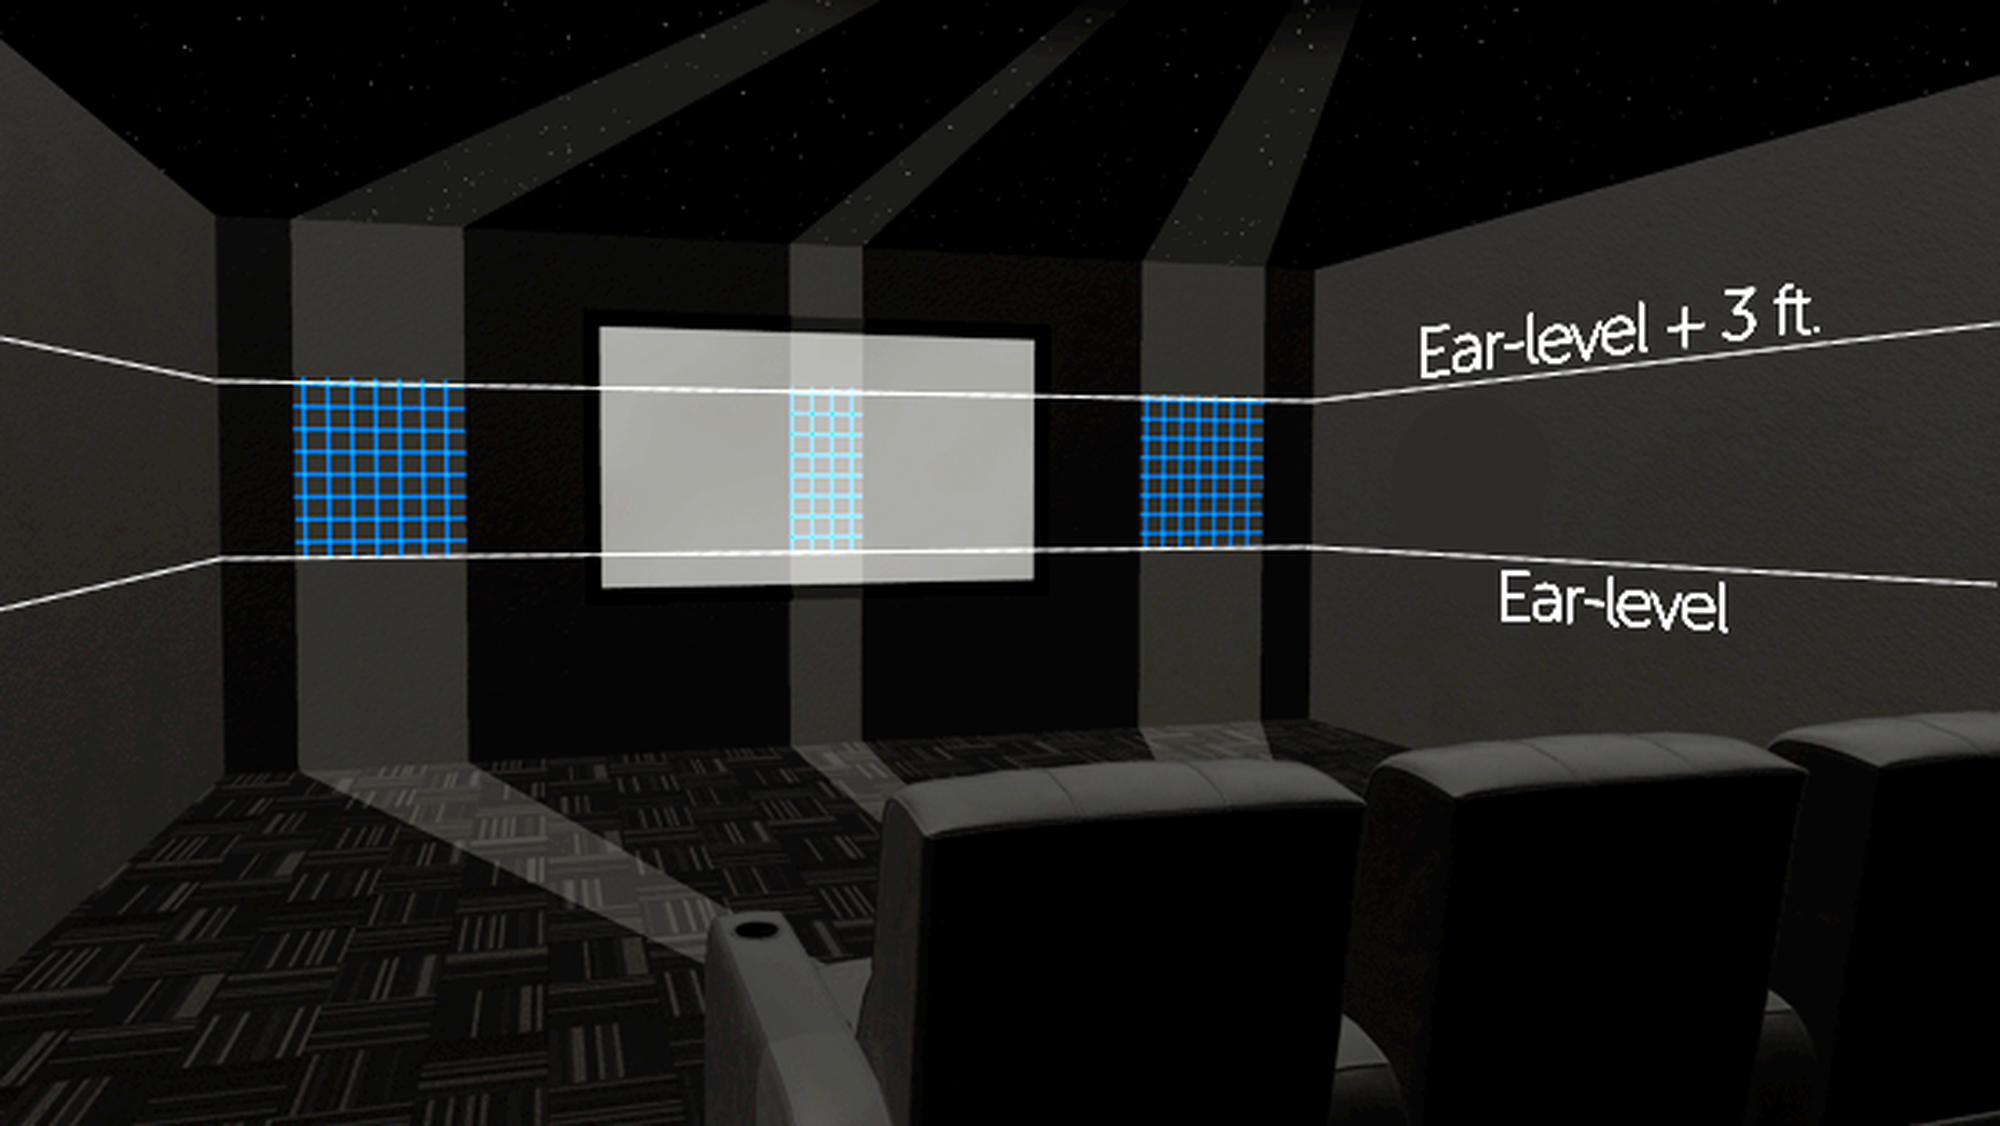
THE BOTTOM OF THE GRID REPRESENTS EAR-LEVEL.
Atmos overhead speakers
Overhead speakers rely on the recommended placement of the left and right speakers. Modus starts with projecting an invisible line from 22° to 30° for each speaker, and intersects it with the plane the screen sits on.
Two rows are then created, one for the left and one for the right speaker. These run perpendicular to the screen. All Atmos overhead speakers should be within these two rows.
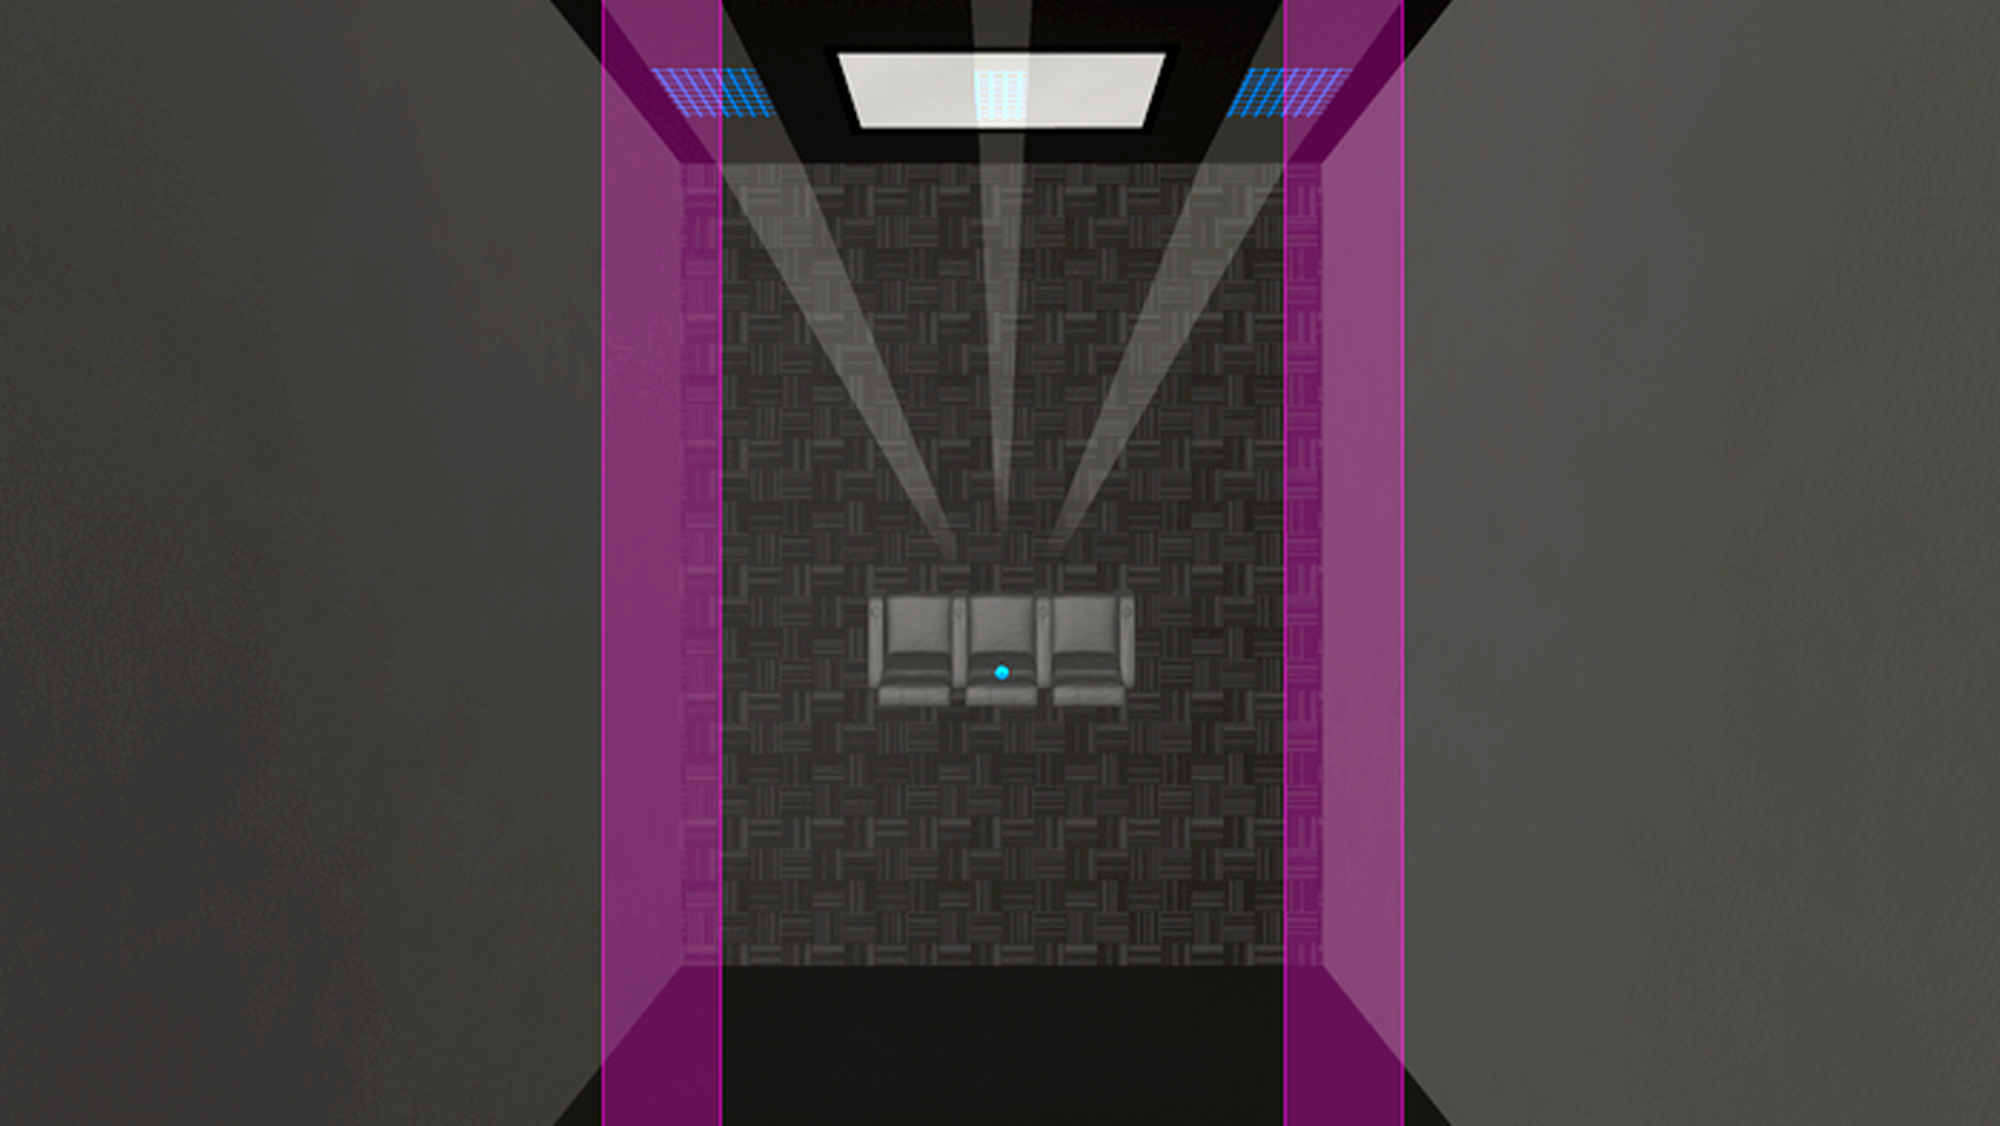
TWO COLUMNS CREATED FROM THE LEFT AND RIGHT SPEAKERS.
Finally, based on the selected layout these rows are divided into the appropriate channels and colored magenta:
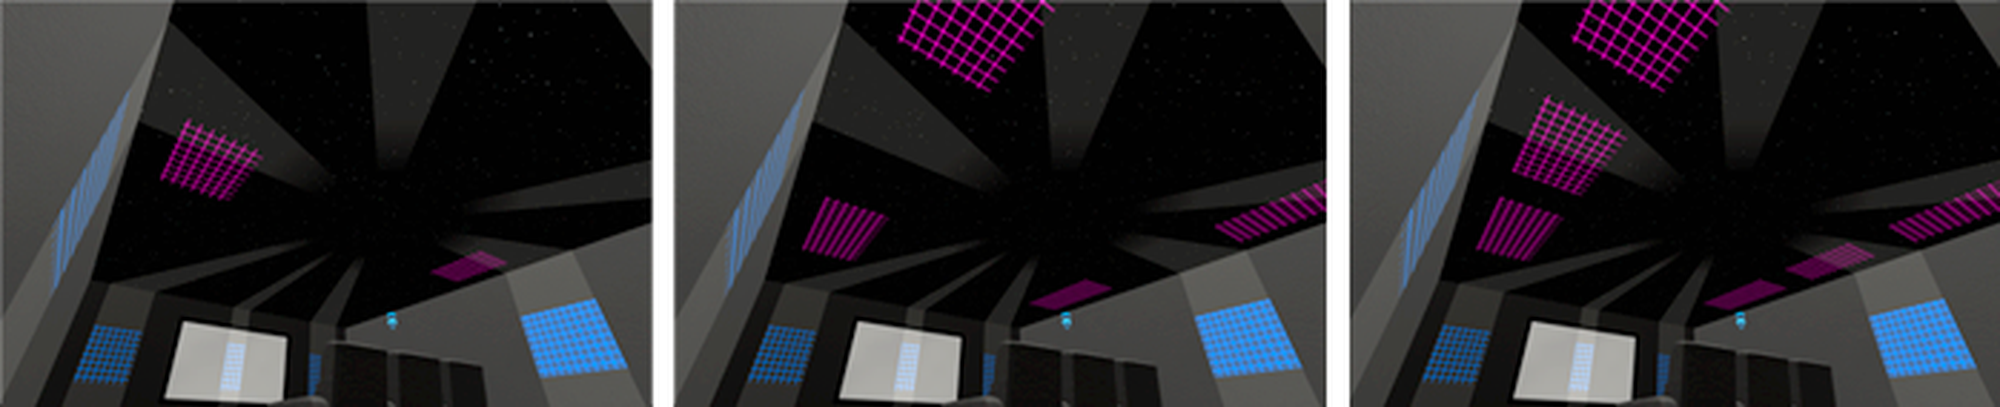
X.X.2, X.X.4, AND X.X.5 LAYOUTS. NOTE THAT ALL OVERHEAD SPEAKERS ARE IN LINE WITH THE LEFT AND RIGHT SPEAKERS.
Mounted speakers
Some rooms, particularly those that are tall and not very deep, may be better supplemented with mounted height speakers instead of additional overhead speakers.
Just like Atmos overhead speakers, mounted speakers should be in the same rows as the left and right speakers. The primary difference is that these are mounted on the front and rear walls rather than the ceiling, and are a lighter color:
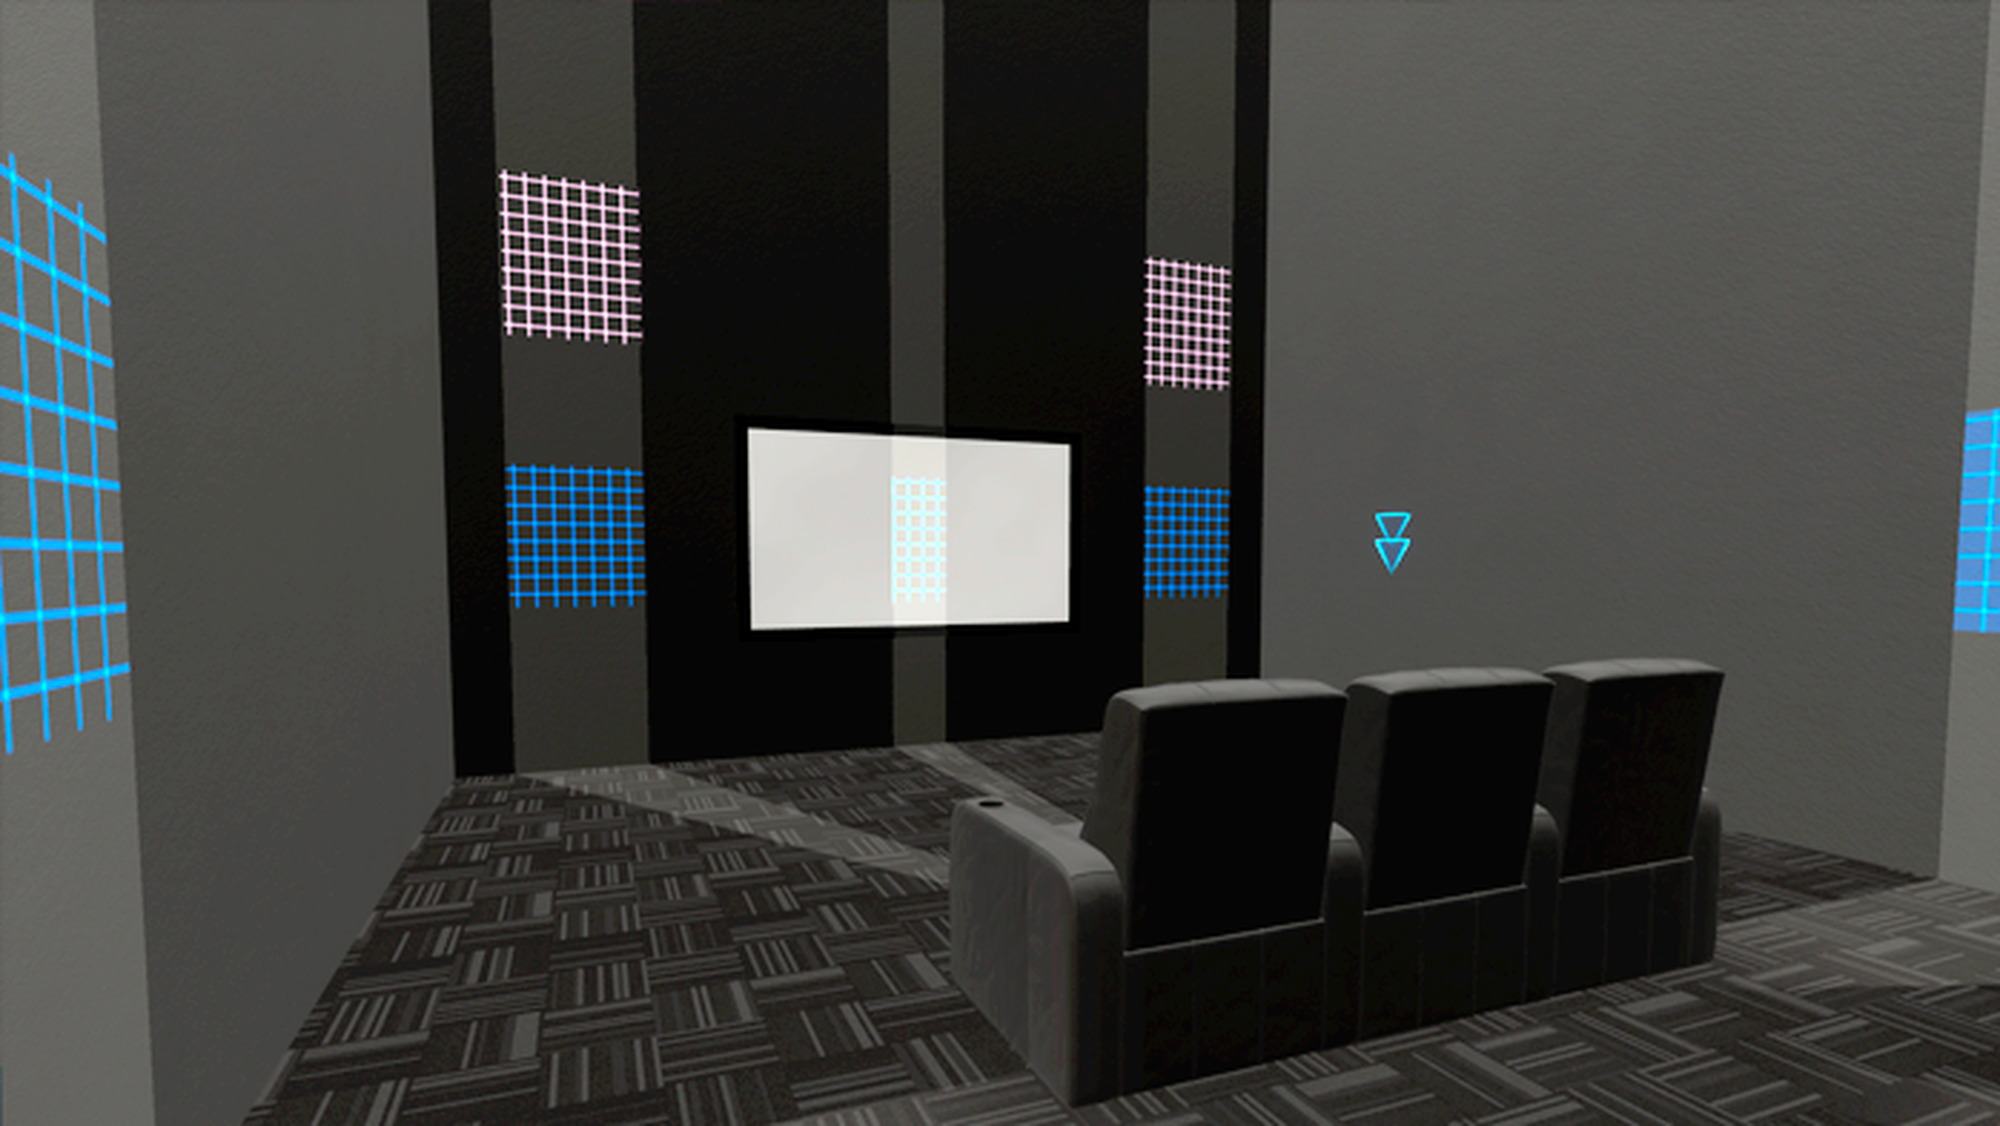
FRONT HEIGHTS SHOULD BE ABOVE THE MAIN LEFT/RIGHT SPEAKERS.
The front heights should be from 20° to 30° (vertically), and the rear height speakers should be from 150° to 160° (vertically). Because of this, if one of these paints a grid on the ceiling, it’s typically best to either adjust the seating placement or, in many cases, select a different speaker layout more appropriate for the room’s proportions.
THE HEIGHT SPEAKERS ARE SHOWING UP ON THE CEILING, WHICH MAY MEAN THE CEILING IS TOO LOW FOR THIS SPEAKER LAYOUT.
Representing angles
Finally, some situations require creative speaker placement. To assist in these cases, Modus also indicates the angles for all ear-level speakers:
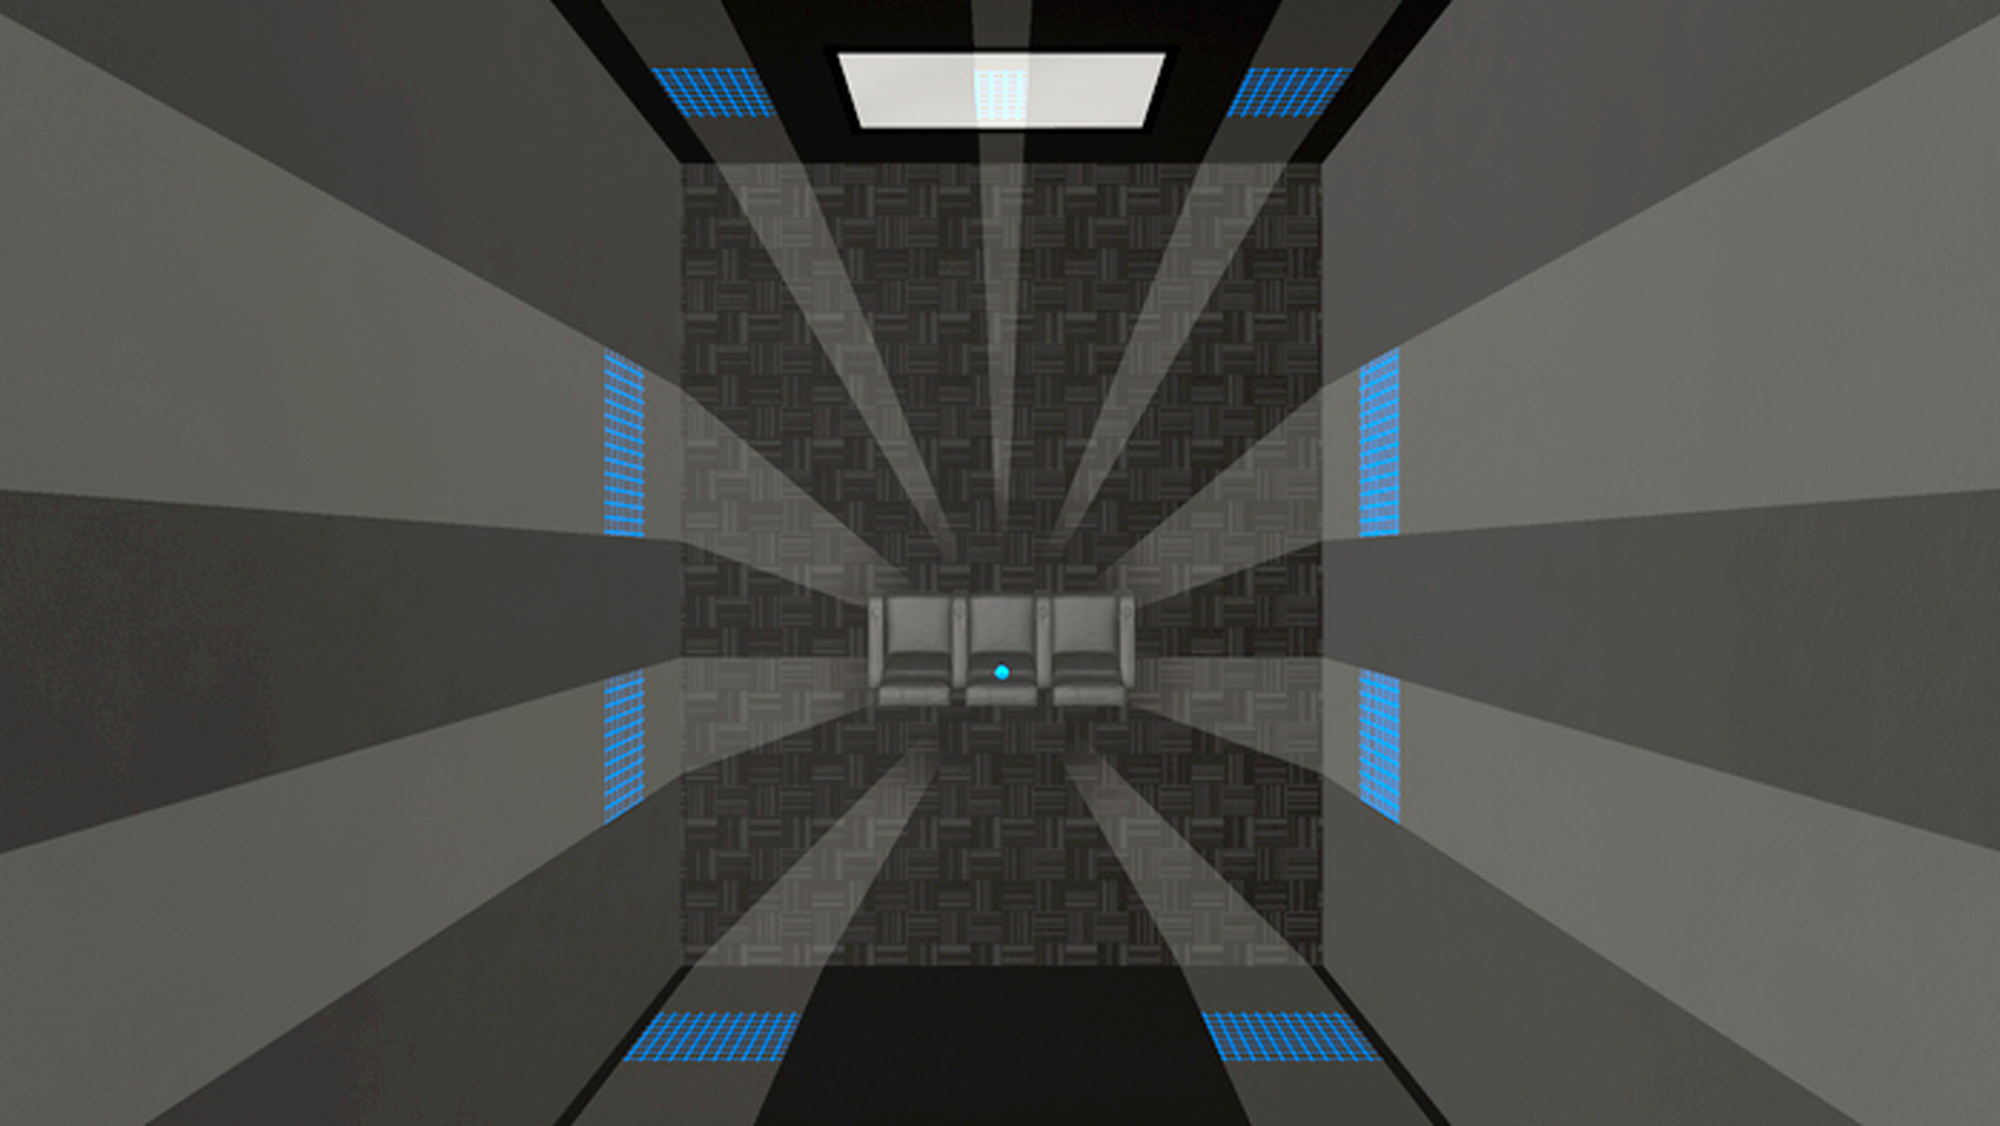
SPEAKER ANGLES PROJECTED ONTO THE FLOOR AND NEARBY OBJECTS.
This can also be particularly helpful if the room has an open back and the rear speakers need to go in the ceiling, or if you need to place floor-standing speakers on a particular location on the floor that’s outside the ideal height.
Understanding how the reference point is calculated
Once a screen and seat have been selected, Modus needs to calculate the reference point. This takes into consideration the following:
- Placement and angle of screen
- Placement and angle of the seat
- A person’s ear position when sitting on the seat
Modus first looks at the screen to determine the audio center line. This is an infinite line that is perpendicular to the screen’s surface:
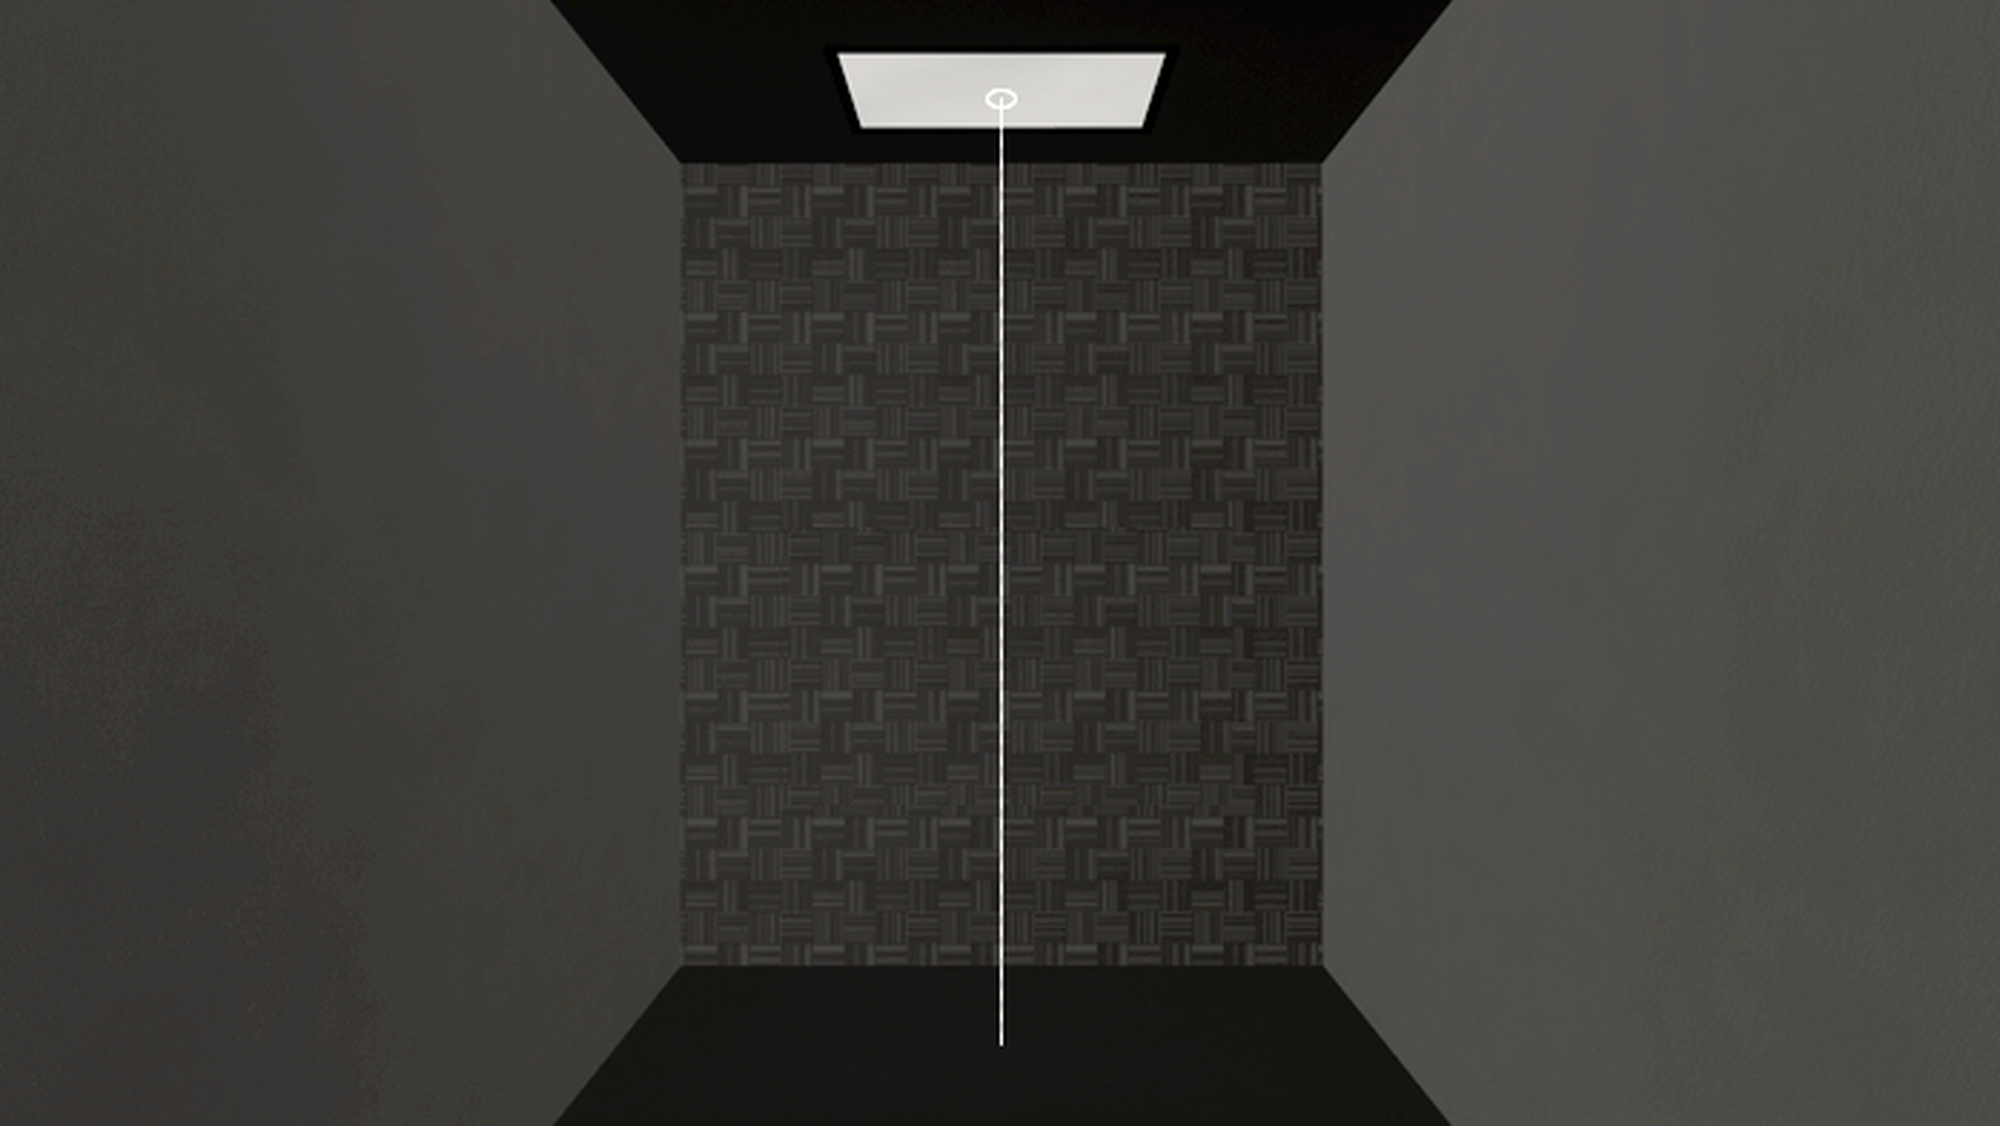
THE LAYOUT’S CENTER LINE IS DETERMINED BY THE CENTER OF THE SCREEN.
Modus then intersects that line with another infinite line that runs along each viewer in the primary seat (or row). Note that Modus ignores the seat’s left-to-right positioning in the room, since all audio should be centered on the screen:
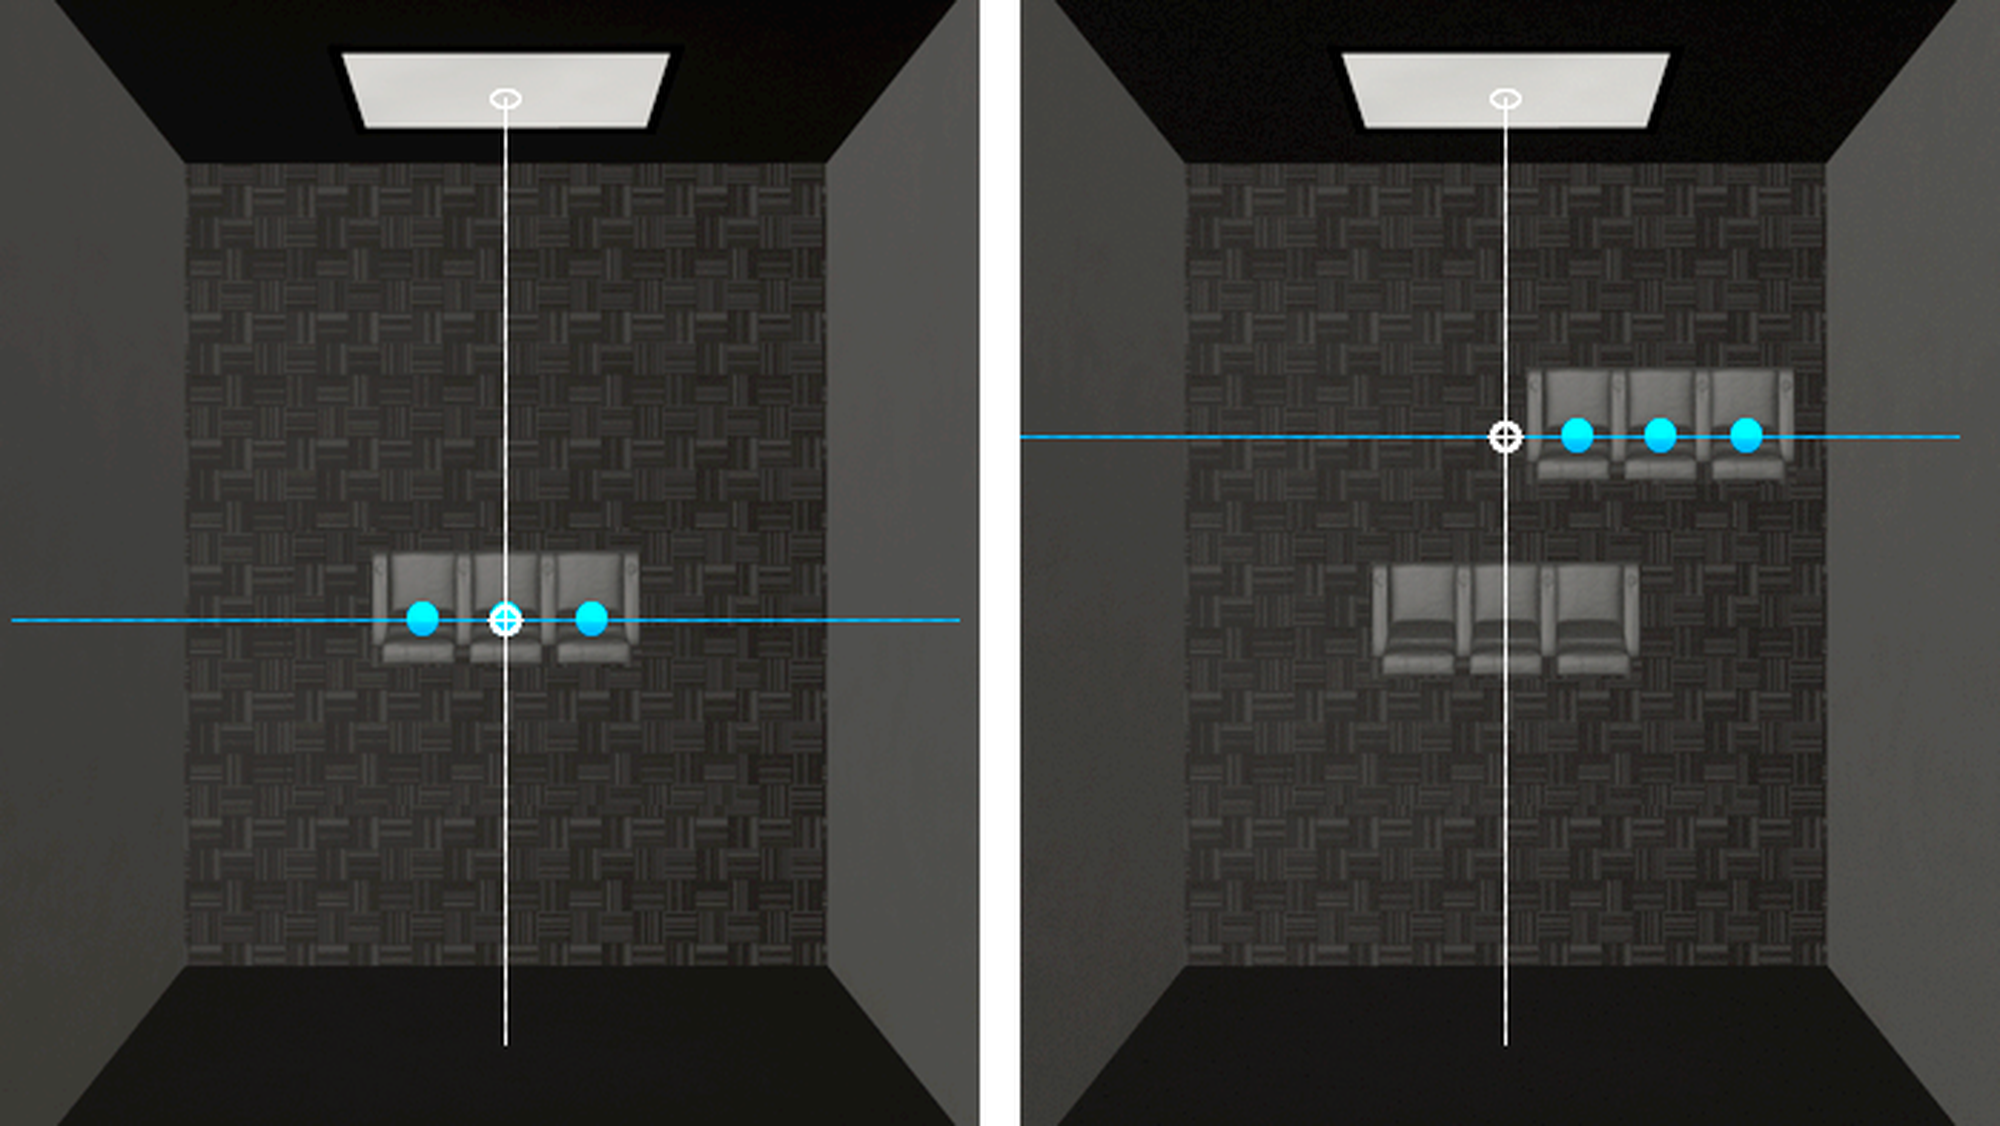
THE REFERENCE POINT IS DETERMINED BY THE SELECTED SEAT’S DISTANCE FROM THE SCREEN.
Finally, the height for the reference point is determined by the ear level for an average height person sitting in the selected seat. Different seats models will change the reference level’s height.
With the Speaker Placement assistant enabled, move the screen and seats around to watch the assistant update in real time.
Why do I sometimes see Atmos overhead grids on side walls? Shouldn’t they always be on the ceiling?
Sometimes things happen that may not make immediate sense, like this scenario:
THE RIGHT SPEAKER HAS SPILLED OVER TO THE RIGHT WALL, CAUSING THE ATMOS OVERHEAD SPEAKERS TO PROJECT TRIANGLES ON THE WALL.
This typically happens when the room is too narrow or the selected seat is too far from the screen. This causes the left and right speakers to move outward to the side walls, which then causes the Atmos overhead speakers to also get pushed outward to the side walls.
The angled projection for the Atmos overhead speakers also appears on the side walls. While this is normal, it may be a sign you should consider deviating from the spec or finding a new approach to the room. In other cases, simply moving the seat closer to the screen will suffice.
Summary
The new Dolby Atmos speaker placement assistant is fast, powerful and can alleviate the pain of trying out different layouts in a room. We’re excited to hear your feedback!